You can start setting up router openwrt on x86 systems with the right instructions and a few simple steps. Gather your x86 hardware and make sure it meets the basic requirements for OpenWRT. Follow the instructions closely for a smooth process. Setting up OpenWRT on x86 systems helps you unlock advanced network features for both business router solution and home router solution needs, while also supporting devices like 5g automotive wireless routers. With reliable guidance from a trusted 5g router supplier, your journey with x86 and OpenWRT begins with careful preparation.
Key Takeaways
- Choose compatible x86 hardware like PC Engines apu boards or mini PCs with Intel i3/i5 processors and Intel Ethernet controllers for the best OpenWRT experience.
- Prepare your system by backing up data, adjusting BIOS/UEFI settings, and downloading the correct OpenWRT image before installation.
- Create a bootable USB drive with the OpenWRT image and boot your device using the proper method for legacy BIOS or UEFI firmware.
- After installation, configure network interfaces carefully, set strong root passwords, and use the LuCI web interface for easy management.
- Keep your system updated safely using the sysupgrade process, install needed drivers and packages, and seek help from official documentation and community forums.
Prerequisites for Setting Up OpenWRT on x86 Systems
Supported x86 Hardware and HUASIFEI Devices
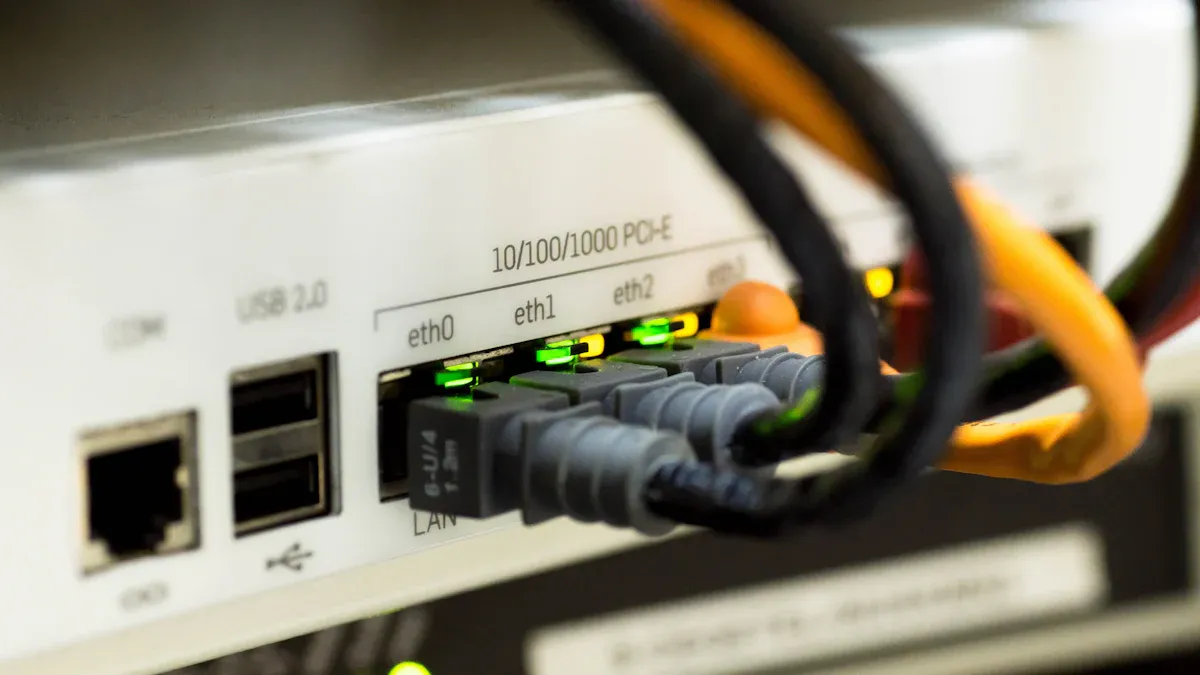
You have many choices when picking hardware for your openwrt setup. The apu series from PC Engines stands out as a favorite in 2025. Many users choose the apu2, apu3, or apu4 models. These boards use an AMD GX-412TC processor and run quietly with low power use. You can also use mini PCs from Dell, Lenovo, or HP. Look for models with Intel i3 or i5 processors from the 8th generation or newer. These mini PCs work well for openwrt and often cost less than new hardware. Intel Ethernet controllers give you better performance and compatibility than Realtek options.
HUASIFEI offers devices that work with openwrt. The Huasifei WH3000, for example, is officially supported in the openwrt community. You can find it listed in the latest releases. Here is a table showing some newly added devices:
| Chipset | Device Model | Notes |
|---|---|---|
| mediatek | Huasifei WH3000 | Newly added device in OpenWrt 24.10.1 |
| mediatek | CMCC A10 | Newly added device |
| mediatek | Keenetic KN-3811 | Newly added device |
| mediatek | Keenetic KN-3911 | Newly added device |
| mediatek | netis NX31 | Newly added device |
Tip: Choose hardware with Intel Ethernet controllers for the best openwrt experience on x86.
Minimum System Requirements and Network Adapters
You do not need a powerful computer for openwrt on x86. The apu boards show that even low-power systems work well. Here are the basic requirements:
- An x86 compatible PC (i386 or greater)
- At least 128MB RAM for a standard openwrt build with the LuCI web interface
- A hard drive or SSD (storage size is not critical, but 8GB or more is common)
- At least two network adapters for routing tasks
Most apu boards come with three Ethernet ports, making them a strong choice for openwrt. If you use a mini PC, make sure it has enough network ports or add a supported network card.
Tools and Downloads Needed for OpenWRT Installation
You need a few tools to start your openwrt installation on x86_64 systems. Gather these items before you begin:
- A working computer
- A USB drive with at least 8GB of space
- Monitor, keyboard, and mouse
- Two Ethernet cables
To create a bootable USB, follow these steps:
- Download the openwrt image for x86_64 from the official site at https://downloads.openwrt.org/.
- Format your USB drive to FAT32.
- Use a tool like balenaEtcher to write the openwrt image to your USB drive.
- Connect your USB drive to your target x86 device and prepare for installation.
You can find the latest stable openwrt images in the releases directory. Look for files like openwrt-24.10.1-x86-64-generic-ext4-combined-efi.img.gz for your apu or mini PC.
Preparing for OpenWRT Installation
Backing Up Existing Data
Before you install a new openwrt image, you should back up your important data. This step protects your settings and files if you need to restore them later. You have several ways to create a backup:
Copy the contents of the
/etcdirectory to a safe location. Use the command:cp -au /etc/. /tmp/mnt/etcThis command copies all configuration files to a temporary mount point.
Check the files listed in
/etc/sysupgrade.conf. Copy each file to your backup location. This ensures you keep custom settings and user-installed packages.Use a script from the openwrt community to automate the backup process. Download the script from GitHub, make it executable with
chmod +x, and run it.If you prefer a graphical method, use the OpenWRT web interface. Go to “System” → “Backup / Flash Firmware” → “Generate archive.” Save the backup archive to your computer. After you install the new openwrt image, you can restore your settings from this archive.
Tip: Always keep your backup files on a separate device or cloud storage for extra safety.
Adjusting BIOS and UEFI Settings
Modern x86 systems use UEFI instead of legacy BIOS. You need to adjust a few settings to prepare for the openwrt image installation and ensure a smooth boot process:
- Use the 64-bit EFI openwrt image for UEFI systems. Most new boards require UEFI, and legacy BIOS support is rare.
- Uncompress the openwrt image before you write it to your USB drive. UEFI boot loaders cannot read compressed images.
- Enter your system’s BIOS or UEFI menu. Disable unused features, but keep serial ports enabled if you need them.
- Set the boot order so your device starts from the USB drive with the openwrt image.
- For virtual machines, select OVMF (UEFI firmware) and import the openwrt image as a disk. Adjust the boot order if the VM opens a UEFI shell instead of starting openwrt.
- If you use EFI, update GRUB entries after writing the image to reflect any changes in partition UUIDs.
Note: UEFI configuration is now essential for most x86 hardware. Make sure you select the correct openwrt image version for your system.
Downloading the Correct OpenWRT Image
You must download openwrt image files that match your hardware and firmware type. Follow these steps to get the right openwrt image:
- Visit the official OpenWRT downloads page.
- Choose the x86_64 architecture for most modern PCs.
- Select the EFI version of the openwrt image for UEFI systems. Pick the non-EFI version if your device uses legacy BIOS.
- Make sure you download openwrt image files with names like
openwrt-24.10.1-x86-64-generic-ext4-combined-efi.img.gz. - After you download openwrt image files, uncompress them before writing to your USB drive.
Always verify the integrity of your openwrt image by checking the provided checksums. This step helps prevent installation errors and ensures a successful boot.
Installation Process for OpenWRT on x86

Creating a Bootable USB Drive
You need a bootable usb to start the openwrt installation on your x86 system. Follow these instructions to create one using a live Linux environment:
- Boot your computer from a live Linux USB stick.
- Open a terminal window.
- Download the latest openwrt x86 image with the command:
wget https://downloads.openwrt.org/releases/24.10.1/targets/x86/64/openwrt-24.10.1-x86-64-generic-ext4-combined-efi.img.gz - Decompress the image file:
gunzip openwrt-24.10.1-x86-64-generic-ext4-combined-efi.img.gz - List all disks to identify your USB drive:
sudo fdisk -l - Confirm the device path for your USB drive (for example,
/dev/sdb). Double-check this step to avoid overwriting your main disk. - Write the openwrt image to your USB drive:
sudo dd if=openwrt-24.10.1-x86-64-generic-ext4-combined-efi.img of=/dev/sdb bs=4M status=progress - Wait for the process to finish. Remove the USB drive safely.
Tip: If you run into partition or boot issues after writing the image, you can use tools like GParted to check the USB drive.
Booting from USB: Legacy BIOS and UEFI Scenarios
When you start the installation, you must boot your x86 device from the USB drive. The boot process depends on whether your system uses legacy BIOS or UEFI firmware.
Legacy BIOS loads a small piece of code from the Master Boot Record (MBR) of your USB drive. This code then loads the bootloader from the active partition. The process is simple and works well for many older systems.
UEFI works differently. It looks for an EFI System Partition (ESP) on your USB drive. This partition uses the FAT file system and stores bootloader files in a standard folder. UEFI firmware reads bootloader paths and disk identifiers from non-volatile memory (NVRAM). This method supports multiple operating systems and secure boot features.
Here is a table comparing the two boot methods:
| Aspect | Legacy BIOS Boot Process | UEFI Boot Process |
|---|---|---|
| Bootloader Location | Master Boot Record (MBR) | EFI System Partition (ESP) |
| Partition Type | MBR with active partition | GPT or MBR with dedicated ESP (FAT formatted) |
| Bootloader Execution | BIOS loads boot sector of active partition | UEFI loads EFI executable from ESP |
| Configuration Storage | BIOS settings | NVRAM (non-volatile memory) |
| Bootloader Flexibility | Single primary bootloader | Multiple OS bootloaders coexist in ESP |
| Security Features | No built-in integrity checks | Supports secure boot with signed EFI binaries |
| Migration | Disk swap usually works across machines | Requires correct NVRAM entries and ESP setup |
Note: Most modern x86 systems use UEFI. Make sure you select the correct openwrt image for your firmware type.
Flashing the OpenWRT Image to the Target Drive
After you boot from the USB drive, you need to flash the openwrt image to your target disk. This step installs openwrt on your x86 device.
- Start your device and boot from the USB drive you created.
- When the openwrt installer loads, open a terminal or use the console.
- Identify your target drive with:
lsblkor
fdisk -l - Double-check the target drive path (for example,
/dev/sda). Make sure you do not select the USB drive. - Write the openwrt image to the target drive:
dd if=/dev/sdb of=/dev/sda bs=4M status=progressReplace
/dev/sdbwith your USB drive and/dev/sdawith your target disk. - Wait for the process to complete. Remove the USB drive.
- Reboot your device. The system should now boot into openwrt.
Always follow these instructions carefully. Double-check each step to avoid data loss. If you see any boot errors, review your BIOS or UEFI settings and confirm you used the correct image.
Partitioning and Disk Management After Installation
Resizing Partitions to Use Full Disk Space
When you install OpenWRT on your x86 device, the system may not use all the space on your ssd or hard drive. You can fix this by resizing the root partition. Start by installing helpful tools. Run this command in your OpenWRT terminal:
opkg update && opkg install lsblk fdisk losetup resize2fs
These tools help you see your disk layout and change partition sizes. Use lsblk to list all block devices and check how much space each partition uses. If you want to make the root partition bigger, use fdisk to adjust the size. Before you do this, unmount any filesystems and turn off swap. After you change the partition, use resize2fs to grow the filesystem if you use ext4. This step lets OpenWRT use all the space on your ssd.
If your device uses UEFI, you may need to update the GRUB configuration. Use lsblk -o PATH,SIZE,PARTUUID to find the new partition UUIDs. Edit /boot/grub/grub.cfg to match the new values.
Tip: Always check your filesystem type with
df -Thbefore resizing. This helps you avoid errors.
Managing Multiple Partitions or Dual Boot Setups
You might want to keep another operating system on your ssd along with OpenWRT. This setup is called dual boot. To do this, create separate partitions for each system. Use fdisk to make new partitions without deleting your data. Make sure each OS has its own space.
When you finish, update the bootloader so you can pick which system to start. On UEFI systems, add entries for each OS in the GRUB menu. This way, you can switch between OpenWRT and your other operating system easily.
Note: Always back up your data before changing partitions. This keeps your files safe if something goes wrong.
First Boot and Initial OpenWRT Configuration
Accessing OpenWRT for the First Time
When you finish installing OpenWRT on your x86 device, you are ready for the first boot. Plug in your device and connect your PC to the LAN port using an Ethernet cable. Your x86 system will start up and assign your PC an IP address through DHCP. Most OpenWRT installations set the LAN interface to 192.168.1.1 by default. Open your web browser and enter http://192.168.1.1 in the address bar. You will see the OpenWRT login screen.
The default username is root. OpenWRT does not set a password at first, so you must create one during or after installation. This step keeps your network secure. If you want to use the console, you can connect a monitor and keyboard or use a serial connection at 115200 bps. These methods give you direct access to the OpenWRT command line for advanced config tasks.
Tip: Always set a strong password for the root user after your first login to protect your device.
Setting Up Network Interfaces and Internet Access
You need to set up your network interfaces before you can use the internet or connect other devices. Follow these steps to get started:
- Assign a static IP address or enable DHCP on your network interfaces. For example, you can set the bridge interface to 192.168.1.2 if you want a static address.
- Enable IP forwarding on your x86 system. This step allows traffic to move between your LAN and WAN interfaces.
- Set up a DHCP server on the LAN interface. This server gives out IP addresses to devices on your network.
- Avoid bridging both WAN and LAN interfaces to the same physical adapter. This practice can cause network problems and make your internet connection unstable.
- Configure firewall and routing rules. These rules help manage traffic flow and keep your network safe.
You should connect your LAN interface to your wired Ethernet adapter. Use a separate interface, such as a WiFi adapter, for WAN traffic. This setup keeps your network organized and helps with wifi configuration later. Always check your config files to make sure each interface has the correct settings.
Note: Proper network segmentation improves security and performance. Keep WAN and LAN on different adapters whenever possible.
Accessing the LuCI Web Interface
The LuCI web interface makes OpenWRT configuration easy. After your first boot, you can reach LuCI by entering 192.168.1.1 in your browser. LuCI listens on ports 80 (HTTP) and 443 (HTTPS). You can use either port, but HTTPS may need extra certificates for full security.
- LuCI is available on all interfaces by default, but you should only access it from the LAN side for safety.
- If you want to reach LuCI from the WAN interface, you must change firewall settings. Assign the WAN interface to the LAN firewall zone only if you trust the upstream network.
- Opening LuCI to the WAN is not recommended. For remote access, use VPN or SSH tunneling instead.
- You can create custom firewall rules to allow access to LuCI or other services as needed.
LuCI is designed for OpenWRT and works best on x86 hardware. You cannot use it on other operating systems like Ubuntu. The openwrt web interface gives you a simple way to manage your network, update packages, and adjust wifi settings. You can also use LuCI to review your config and make changes without using the command line.
Tip: Always review your firewall config before exposing LuCI to any network outside your LAN.
Essential Post-Installation Steps for OpenWRT
Updating OpenWRT and Installing Packages
You should always keep your system up to date. Updating to the latest openwrt version helps you get new features and security fixes. Here is a simple process you can follow:
- Check that you have a USB to TTL Serial adapter and drivers ready.
- Install a USB terminal app like minicom.
- Read the release notes for the latest openwrt version.
- Download the correct image for your device.
- Back up your settings using LuCI or the command line.
- Use the web interface to start the upgrade.
- After your device reboots, log in with SSH to check the version.
- If you use HTTPS for LuCI, reinstall the needed packages and restart the web server.
- Make sure everything works by checking your network and firewall settings.
You can also use the Attended Sysupgrade tool. This tool lets you upgrade from the LuCI web interface. It keeps your installed packages and settings.
Tip: Always back up your configuration before you upgrade.
Installing Drivers and Additional Software
Your x86 device may need extra drivers for network adapters. OpenWRT uses kernel modules that start with kmod-. You can find out which drivers you need by running lspci for PCI devices or lsusb for USB devices. Here are some common drivers:
kmod-igbfor Intel PCI Ethernet adapterskmod-usb-net-rtl8152for Realtek USB Ethernet adapters
To install a driver, use the opkg package manager. For example:
opkg update
opkg install kmod-igb
If you want to add WiFi, Mediatek chipsets work well with openwrt.
You can also install extra software to make your router more useful. Many users add ad blockers, VPN tools, or file sharing apps.
Adding Useful Packages for x86 Systems
You can boost your openwrt system by adding helpful packages. Here are some popular choices:
- Ad Blocking: Use adblock, simple-adblock, or AdGuard Home to block ads across your network.
- VPN Tools: Set up a VPN client or server to protect your privacy and allow secure remote access.
- Download Manager: Install aria2 and webui-aria2 to download files or torrents directly to your device.
- File Sharing: Use Samba (ksmbd) or FTP servers to share files, turning your device into a simple NAS if you use an ssd.
- Media Server: Add MiniDLNA to stream media files to smart TVs and other devices.
You can install these packages using the LuCI web interface or the command line. Always update your package list first:
opkg update
Note: Adding only the packages you need helps keep your system fast and secure.
Troubleshooting, Upgrades, and OpenWRT Resources
Common Installation Issues and Solutions
When you set up OpenWRT on x86 hardware, you may face some common problems. Here are issues that users often report:
- You might see “permission denied” errors when you try to install or enable custom services.
- Sometimes, important files like
/etc/init.d/hueemulatorWrt-serviceorlighttpd.confare missing. - Python-based services can fail with errors in scripts like
updateManager.py. - The web server may change from lighttpd to uhttpd, which can cause compatibility problems.
- On some hardware, installation scripts fail, especially during pip package installs.
- Services may not start after a reboot, and manual starts can show errors.
A special issue affects AMD Geode LX hardware. The hardware random number generator (RNG) driver has not worked since OpenWRT 19.07. This causes low entropy, so the system cannot create enough random numbers for security tasks.
To fix installation failures, try these steps:
- Check that your software source URLs are correct if package installs fail.
- Make sure your network interfaces and WAN port are set up so you have internet access.
- Use SSH tools like Putty or WinSCP for remote management and file transfers.
- If Luci is missing, install it with OPKG commands and start the web server.
- Manually mount drives if automatic mounting does not work.
- For network card issues, compile drivers into the image if needed.
- Set a root password to enable SSH login.
Tip: Always back up your settings before making big changes.
Upgrading OpenWRT Safely on x86 Systems
You should avoid using opkg upgrade to update packages. This method can cause your system to stop working or run out of space. The best way to upgrade OpenWRT is to use the sysupgrade process. This method updates the whole firmware and keeps your settings safe.
Here is a safe upgrade plan:
- Prepare a new OpenWRT image on a separate partition or USB stick.
- Use your bootloader, like grub2, to pick which system to start.
- If the new system does not work, you can go back to the old one.
- Always back up your configuration before you upgrade.
This approach lets you test upgrades and roll back if needed. It works well on x86 hardware because you can manage disk partitions and boot menus.
Official Documentation and Community Support
You can find the latest openwrt documentation for x86 systems on TekLager’s knowledge base. This guide explains how to download images, flash them to your drive, and resize partitions. It also lists commands for installing software and links to more tutorials.
For help from other users, visit the official OpenWRT forum. Many threads discuss x86 topics like sysupgrade, dual booting, and hardware support. The Level1Techs forum also has active discussions about running OpenWRT on x86 hardware. These communities share tips, guides, and troubleshooting advice.
Note: Reading guides and joining forums helps you solve problems faster and learn from others.
Setting up openwrt on x86 systems gives you powerful control over your network. You can enjoy features like real-time monitoring, advanced firewall options, and router-level ad blocking. Always back up your data before you start setting up openwrt on x86 systems. Check that your hardware, including HUASIFEI devices, matches the requirements. When you finish setting up openwrt on x86 systems, you gain:
- Frequent security updates and strong privacy tools
- Flexible customization with thousands of packages
- Support from an active community
Take advantage of these benefits to keep your network secure and reliable.
FAQ
How do you reset your OpenWRT x86 device to factory settings?
You can reset your device by holding the reset button for 10 seconds during boot. If your device does not have a button, connect with SSH and run:
firstboot && reboot
This command erases all settings and restarts your device.
Can you install OpenWRT on a virtual machine?
Yes, you can install OpenWRT on a virtual machine. Download the x86 image, create a new VM, and attach the image as a disk. Set the VM to use UEFI or BIOS, depending on your image.
What should you do if you cannot access the LuCI web interface?
Check your network cable and make sure your PC gets an IP address from OpenWRT. Try to reach http://192.168.1.1. If it fails, use SSH to log in and run:
opkg update && opkg install luci
This command installs LuCI if it is missing.
How do you add more network ports to your x86 OpenWRT system?
You can add more network ports by installing a supported PCIe or USB network card. Use lspci or lsusb to check if OpenWRT detects the new card. Install the correct driver with opkg install if needed.