
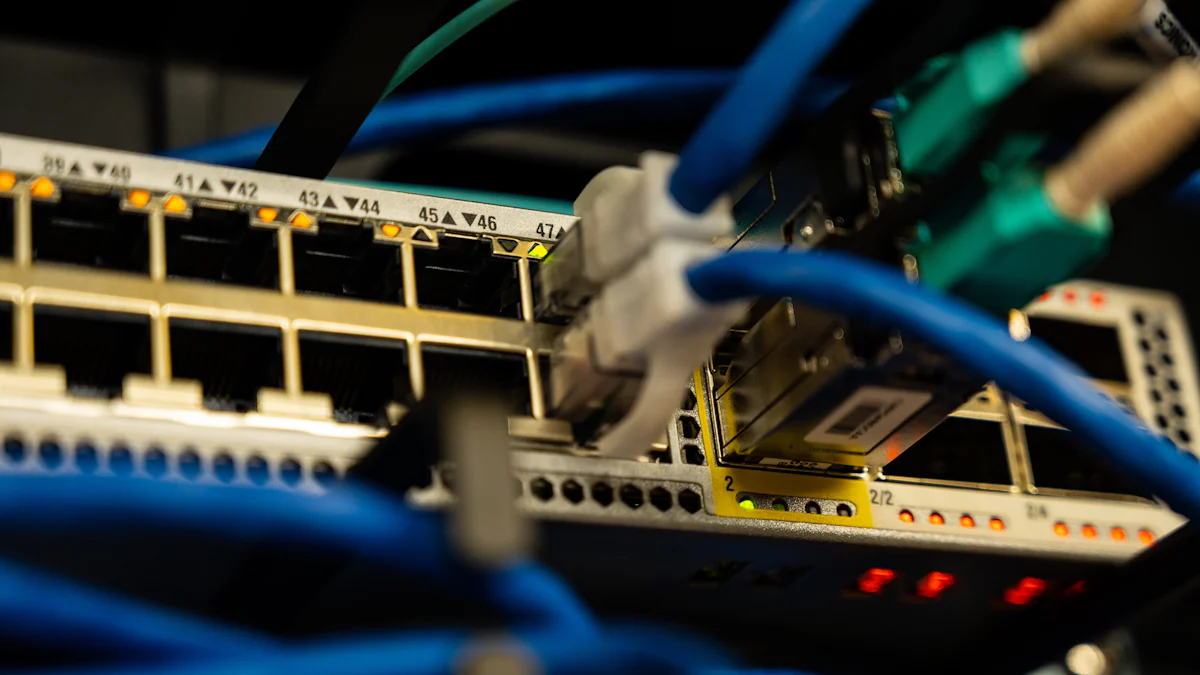
Расширение сети с помощью второго маршрутизатора openwrt может значительно улучшить работу в Интернете. Оптимизировав настройку, вы сможете удвоить скорость интернета с От 100/10 Мбит/с до 200/20 Мбит/с. Это улучшение не только повышает вашу производительность проводных сетей но и улучшает возможности беспроводного подключения. С маршрутизатор openwrt wifi 6Вы можете достичь Скорость 500 мбит через мост WiFi. Дополнительно, управление пропускной способностью Настройка нескольких сетей упрощается, позволяя эффективно ограничивать ежедневное использование. Эти усовершенствования обеспечивают лучшее покрытие и производительность, делая вашу сеть более надежной и эффективной.
Понимание потребностей вашей сети
Когда вы решаете расширить свою сеть с помощью второго маршрутизатора OpenWRT, понимание конкретных потребностей сети становится решающим. Этот шаг позволит вам принять обоснованное решение, которое будет соответствовать вашим целям по улучшению связи и производительности.
Оценка текущих ограничений сети
Начните с оценки ограничений вашей текущей сети. Определите области, в которых ваша сеть не работает, например, слабый уровень сигнала, низкая скорость интернета или ограниченное покрытие. Например, если скорость интернета ограничена на уровне 100/10 Мбит/с, вы можете заметить вялую работу в пиковые моменты. Добавив второй маршрутизатор, вы сможете удвоить эту скорость до 200/20 Мбит/сУлучшение проводных и беспроводных соединений.
Учитывайте аппаратные характеристики имеющегося маршрутизатора. Многие маршрутизаторы поставляются с двухъядерные процессоры ARM и несколько радиостанций, что может значительно Повышение скорости и уровня сигнала. Однако некоторые маршрутизаторы могут испытывать трудности с сотрудничеством из-за используемого чипа беспроводной связи. Понимание этих технических аспектов поможет вам определить, что именно нуждается в улучшении.
Определение назначения второго маршрутизатора
После того как вы оценили ограничения вашей текущей сети, определите конкретную цель использования второго маршрутизатора. Хотите ли вы расширить зону покрытия WiFi, чтобы устранить мертвые зоны в вашем доме? Или вы хотите создать гостевую сеть для посетителей без ущерба для безопасности вашей основной сети?
Второй маршрутизатор сконфигурирована как "тупая точка доступа". может эффективно расширить зону покрытия беспроводной сети. Эта настройка отключает DHCP на втором маршрутизаторе, предотвращая конфликты IP-адресов и обеспечивая бесшовную интеграцию с основным маршрутизатором. Дополнительно, настройка виртуальных локальных сетей позволяет управлять различными сегментами сети, например гостевыми сетями, обеспечивая повышенную безопасность и контроль.
Четко определив назначение второго маршрутизатора OpenWRT, вы сможете настроить его конфигурацию в соответствии с вашими потребностями. Будь то увеличение скорости интернета, повышение уровня сигнала или управление использованием полосы пропускания, хорошо спланированное расширение сети может преобразить ваш опыт работы в интернете.
Подготовка к установке
Прежде чем приступить к настройке второго маршрутизатора openwrt, необходимо подготовиться. Такая подготовка обеспечит плавный процесс установки и оптимальную производительность.
Сбор необходимого оборудования
Для начала соберите все необходимые аппаратные компоненты. Вам понадобится совместимый маршрутизатор, который поддерживает OpenWRT. Не все маршрутизаторы могут работать с OpenWRT, поэтому выбирайте тот, который по сути является самостоятельным компьютером. Сайт Совместимые с OpenWRT маршрутизаторы список - ценный ресурс для поиска подходящих устройств. В нем представлены самые разные варианты - от доступных потребительских моделей до высококлассных корпоративных систем.
Убедитесь, что у вас наготове следующие предметы:
- Маршрутизатор, совместимый с OpenWRT: Проверьте Таблица оборудования OpenWRT для поиска поддерживаемых моделей. Ищите устройства, которые поддерживаются текущим стабильным выпуском.
- Кабели Ethernet: Они необходимы для подключения маршрутизаторов и обеспечения стабильной работы сети.
- Адаптеры питания: Убедитесь, что у вас есть правильный блок питания для маршрутизаторов.
- Компьютер или ноутбук: Потребуется для доступа к интерфейсу маршрутизатора для настройки.
Наличие под рукой всех этих компонентов упростит процесс установки и предотвратит ненужные задержки.
Обеспечение совместимости с существующей сетью
Совместимость - ключевой момент при интеграции второго маршрутизатора в существующую сеть. Прежде всего убедитесь, что новый маршрутизатор совместим с текущей сетевой конфигурацией. В идеале оба маршрутизатора должны быть одной марки и модели, чтобы обеспечить бесшовную интеграцию. Такое сходство поможет им одинаково работать с такими функциями, как WDS (Wireless Distribution System).
Затем проверьте версию прошивки. Оба маршрутизатора должны работать под управлением совместимых версий OpenWRT. Такая совместимость гарантирует, что они смогут эффективно взаимодействовать и управлять сетевым трафиком. Если ваши маршрутизаторы поддерживают разные версии, обновите их до последней стабильной версии.
Наконец, рассмотрим возможности беспроводной связи. В OpenWRT Самая большая слабость - WiFi из-за драйверов с закрытым исходным кодом, что может привести к снижению скорости и дальности действия по сравнению с фирменной прошивкой. Убедитесь, что ваши маршрутизаторы способны справиться с требованиями вашей сети, особенно если вы планируете расширить зону покрытия WiFi.
Собрав необходимое оборудование и обеспечив его совместимость, вы создадите основу для успешного расширения сети с помощью второго маршрутизатора openwrt.
Начальная конфигурация основного маршрутизатора
Правильная настройка основного маршрутизатора имеет решающее значение для успешного расширения сети. Этот шаг гарантирует, что второй маршрутизатор openwrt легко интегрируется в существующую сеть.
Доступ к интерфейсу маршрутизатора
Для начала вам необходимо получить доступ к интерфейсу основного маршрутизатора. Этот интерфейс позволяет настраивать параметры и управлять сетью. Чтобы получить доступ к нему, выполните следующие действия:
Подключение к сети: Используйте компьютер или ноутбук, подключенный к маршрутизатору через кабель Ethernet или WiFi.
Откройте веб-браузер: Запустите выбранный вами веб-браузер. Введите IP-адрес маршрутизатора в адресную строку. Обычные IP-адреса по умолчанию включают
192.168.1.1или192.168.0.1. Если вы не уверены, обратитесь к руководству по эксплуатации маршрутизатора.Войти: Вы увидите страницу входа в систему. Введите имя пользователя и пароль. Если вы их не меняли, используйте учетные данные по умолчанию, предоставленные производителем. Рекомендуется изменить эти учетные данные в целях безопасности.
Войдя в систему, вы можете получить доступ к различным настройкам, чтобы оптимизировать сеть для расширения.
Настройка параметров сети для расширения
Получив доступ к интерфейсу маршрутизатора, вы можете настроить необходимые параметры для расширения сети. Вот как это сделать:
Обновление микропрограммы: Убедитесь, что на вашем маршрутизаторе установлена последняя версия микропрограммы. Это обновление содержит новые функции и исправления безопасности. Перейдите в раздел обновления прошивки и следуйте инструкциям для обновления.
Настройка DHCP: Ваш основной маршрутизатор должен работать с DHCP. Эта настройка назначает IP-адреса устройствам в вашей сети. Перейдите к настройкам DHCP и убедитесь, что он включен.
Настройка параметров локальной сети: Настройте параметры локальной сети с учетом второго маршрутизатора openwrt. Назначьте уникальный диапазон IP-адресов, который не будет конфликтовать со вторым маршрутизатором. Такая конфигурация предотвращает конфликты IP-адресов.
Включите WDS (если применимо): Если вы планируете использовать Wireless Distribution System (WDS) для создания беспроводного моста, включите эту функцию в настройках беспроводной сети. Эта функция обеспечивает бесперебойную беспроводную связь между маршрутизаторами.
Защитите свою сеть: Установите надежный пароль WiFi и включите шифрование WPA3, если оно доступно. Эта мера безопасности защитит вашу сеть от несанкционированного доступа.
Выполнив эти шаги, вы подготовите свой основной маршрутизатор к интеграции второго маршрутизатора openwrt. Такая подготовка гарантирует стабильное и эффективное расширение сети.
Настройка второго маршрутизатора OpenWRT

Настройка второго маршрутизатора openwrt включает в себя несколько важнейших этапов. Этот процесс гарантирует, что расширение сети будет успешным и эффективным.
Прошивка прошивки OpenWRT
Для начала необходимо прошить прошивку OpenWRT на второй маршрутизатор. Этот шаг необходим для превращения вашего маршрутизатора в универсальное сетевое устройство. Выполните следующие шаги, чтобы прошить прошивку:
Загрузите прошивку: Посетите официальный сайт OpenWRT. Найдите версию прошивки, совместимую с вашей моделью маршрутизатора. Загрузите соответствующий файл на свой компьютер.
Доступ к интерфейсу маршрутизатора: Подключите компьютер к маршрутизатору с помощью кабеля Ethernet. Откройте веб-браузер и введите IP-адрес маршрутизатора в адресной строке. Войдите в систему, используя учетные данные по умолчанию.
Загрузите прошивку: Перейдите в раздел обновления прошивки в интерфейсе маршрутизатора. Выберите загруженный файл прошивки OpenWRT. Нажмите кнопку загрузки, чтобы начать процесс прошивки.
Дождитесь завершения: Дайте маршрутизатору завершить процесс прошивки. Не прерывайте этот процесс, так как это может привести к повреждению маршрутизатора. После завершения маршрутизатор автоматически перезагрузится.
Проверка установки: После перезагрузки снова войдите в интерфейс маршрутизатора. Убедитесь, что прошивка OpenWRT установлена правильно. Вы должны увидеть интерфейс OpenWRT, что свидетельствует об успешной установке.
Прошивка прошивки подготавливает маршрутизатор к работе с расширенными конфигурациями и функциями, предлагаемыми OpenWRT.
Основные шаги по настройке
После того как вы прошили прошивку, приступайте к базовой настройке второго маршрутизатора openwrt. Эти шаги обеспечат оптимальное функционирование маршрутизатора в вашей сети:
Установка статического IP-адреса: Назначьте статический IP-адрес второму маршрутизатору. Этот адрес должен находиться в той же подсети, что и основной маршрутизатор, но вне его диапазона DHCP. Такая настройка предотвращает конфликты IP-адресов и обеспечивает стабильное подключение.
Отключить DHCP: Зайдите в сетевые настройки в интерфейсе OpenWRT. Отключите DHCP-сервер на втором маршрутизаторе. Это действие позволяет основному маршрутизатору управлять IP-адресами для всех устройств в сети.
Настройка параметров беспроводной сети: Настройте беспроводную сеть на втором маршрутизаторе. Используйте тот же SSID и настройки безопасности, что и на основном маршрутизаторе. Такая конфигурация обеспечивает бесперебойную работу WiFi для пользователей, перемещающихся между зонами покрытия.
Подключение к основному маршрутизатору: С помощью кабеля Ethernet подключите порт LAN второго маршрутизатора к порту LAN основного маршрутизатора. Такое соединение обеспечивает стабильную и быструю передачу данных между маршрутизаторами.
Тестовое подключение: Убедитесь, что устройства могут подключаться к сети через второй маршрутизатор. Проверьте доступ в Интернет и убедитесь, что сеть работает без сбоев.
Следуя этим основным шагам настройки, вы эффективно интегрируете второй маршрутизатор openwrt в существующую сеть. Такая настройка улучшает покрытие и производительность сети, обеспечивая более качественный доступ в Интернет.
Настройка второго маршрутизатора в качестве неработающей точки доступа
Настройка второго маршрутизатора OpenWRT в качестве точки доступа Dumb Access Point (AP) может значительно повысить эффективность вашей сети. Такая настройка позволяет расширить зону покрытия WiFi, не перегружая основной роутер дополнительными задачами. По ссылке разделение обязанностей маршрутизации и беспроводного доступа, вы можете избегать конкуренции за ресурсы и обеспечить бесперебойную работу сети.
Отключение DHCP
Для начала вам нужно отключить DHCP-сервер на втором маршрутизаторе. Этот шаг очень важен, поскольку он предотвращает конфликты IP-адресов в вашей сети. Вот как это можно сделать:
Доступ к интерфейсу маршрутизатора: Подключите компьютер ко второму маршрутизатору с помощью кабеля Ethernet. Откройте веб-браузер и введите IP-адрес маршрутизатора в адресную строку. Войдите в систему, используя свои учетные данные.
Перейдите в раздел "Настройки сети".: После входа в систему перейдите в раздел сетевых настроек. Найдите настройки DHCP-сервера.
Отключить DHCP: Найдите опцию отключения DHCP-сервера. Это действие гарантирует, что ваш основной маршрутизатор останется единственным устройством, управляющим IP-адресами всех подключенных устройств.
Отключение DHCP на втором маршрутизаторе позволяет ему работать исключительно в качестве беспроводной точки доступа, повышая общую стабильность и производительность сети.
Настройка статического IP-адреса
После отключения DHCP необходимо назначить статический IP-адрес второму маршрутизатору. Этот шаг гарантирует, что маршрутизатор останется легкодоступным в вашей сети. Выполните следующие действия:
Доступ к интерфейсу маршрутизатора: Для входа в интерфейс маршрутизатора используйте тот же способ, что и раньше.
Перейдите в раздел "Настройки локальной сети".: Перейдите в раздел "Настройки локальной сети". Здесь можно настроить параметры IP-адреса.
Назначение статического IP-адреса: Выберите IP-адрес в той же подсети, что и основной маршрутизатор, но вне его диапазона DHCP. Например, если IP-адрес вашего основного маршрутизатора
192.168.1.1Вы можете назначить192.168.1.2на второй маршрутизатор.Сохранить изменения: После назначения статического IP сохраните изменения и при необходимости перезагрузите маршрутизатор.
Задав статический IP-адрес, вы гарантируете, что ваш второй маршрутизатор останется надежной частью вашей сетевой инфраструктуры. Такая конфигурация позволит вам легко управлять маршрутизатором и получать к нему доступ при необходимости.
Настройка второго маршрутизатора openwrt в качестве Dumb AP не только расширяет зону покрытия WiFi, но и оптимизирует производительность сети. Следуя этим шагам, вы создадите бесперебойную и эффективную сетевую среду, отвечающую вашим потребностям в подключении.
Расширение сети WiFi
Расширение сети WiFi включает в себя настройку второго Маршрутизатор OpenWRT чтобы обеспечить бесперебойное подключение и оптимальную производительность. Правильная настройка SSID и параметров безопасности, а также оптимизация выбора канала позволят создать надежную беспроводную среду.
Настройка параметров SSID и безопасности
Чтобы эффективно расширить сеть WiFi, необходимо настроить SSID и параметры безопасности на втором маршрутизаторе. SSID, или Идентификатор набора услугИмя вашей беспроводной сети. Оно помогает устройствам идентифицировать и подключаться к сети. Выполните следующие действия, чтобы настройте SSID и настройки безопасности:
Доступ к интерфейсу маршрутизатора: Подключите компьютер ко второму маршрутизатору с помощью кабеля Ethernet. Откройте веб-браузер и введите IP-адрес маршрутизатора в адресную строку. Войдите в систему, используя свои учетные данные.
Перейдите к разделу "Настройки беспроводной связи".: После входа в систему перейдите в раздел настроек беспроводной сети. Здесь вы можете настроить SSID и параметры безопасности.
Установите SSID: Введите тот же SSID, что и на основном маршрутизаторе. Такая настройка позволяет устройствам плавно переключаться между маршрутизаторами без необходимости переподключения вручную.
Выберите тип безопасности: Выберите тип безопасности для вашей сети. WPA3 обеспечивает самый высокий уровень безопасности, но если он недоступен, выберите WPA2. Этот выбор гарантирует, что ваша сеть будет защищена от несанкционированного доступа.
Установите надежный пароль: Создайте надежный пароль для WiFi. Для повышения безопасности используйте комбинацию букв, цифр и символов. Избегайте использования легко угадываемой информации, например дней рождения или общеупотребительных слов.
Настроив SSID и параметры безопасности, вы обеспечите безопасность расширенной сети и доступ к ней только для авторизованных пользователей.
Оптимизация выбора канала
Оптимизация выбора канала имеет решающее значение для минимизации помех и максимальной производительности WiFi. Беспроводные сети работают на определенных каналах, и перекрытие каналов может вызвать помехи, что приведет к снижению скорости и проблемам с подключением. Вот как можно оптимизировать выбор канала:
Анализ беспроводной среды: Используйте инструмент анализатора WiFi для сканирования беспроводной среды. Определите, какие каналы наиболее перегружены, а какие менее загружены.
Выберите оптимальный канал: На основе анализа выберите канал с минимальным уровнем помех. Каналы 1, 6 и 11 часто рекомендуются для сетей 2,4 ГГц, поскольку они не пересекаются.
Настройка ширины канала: Если маршрутизатор поддерживает эту функцию, настройте ширину канала. Более широкий канал может обеспечить более высокую скорость, но при этом может увеличить количество помех. Установите баланс между скоростью и стабильностью, выбрав подходящую ширину.
Тестирование и мониторинг: После выбора канала проверьте работу сети. Отслеживайте подключение на предмет любых проблем и при необходимости вносите коррективы.
Оптимизируя выбор каналов, вы повышаете стабильность и скорость работы вашей сети WiFi, обеспечивая лучшие условия для всех подключенных устройств.
Интеграция виртуальных локальных сетей для сегментации сети
Расширение сети с помощью виртуальных локальных сетей (VLAN) может значительно улучшить ее организацию и безопасность. VLAN позволяют разделить сеть на отдельные части, каждая из которых имеет свои правила и средства контроля доступа. Такая сегментация помогает эффективнее управлять трафиком и обеспечивает лучшую безопасность за счет изоляции различных типов сетевого трафика.
Понимание основ виртуальных локальных сетей
VLAN - это, по сути, виртуальная сеть, которая работает поверх существующей физической сети. Она позволяет создавать отдельные сети в рамках одной физической инфраструктуры. Подумайте об этом, как о разделении одной дороги на несколько полос, каждая из которых предназначена для определенных типов транспортных средств. Такое разделение помогает управлять транспортным потоком и уменьшает заторы.
Ключевые моменты о виртуальных локальных сетях:
- Виртуальная сеть: VLANs - это программно-определяемые сети которые работают поверх вашей физической сети.
- Сегментация трафика: Они помогают сегментировать сетевой трафик, что повышает производительность и безопасность.
- Изоляция: VLAN изолируют различные типы трафика, например гостевых пользователей или конфиденциальные данные, от основной сети.
При настройке виртуальных локальных сетей рекомендуется нумеровать сети и виртуальные локальные сети одинаковыми номерами. Например, если у вас есть VLAN 3Он должен соответствовать сети 192.168.3.x. Такая практика упрощает управление и уменьшает путаницу.
Настройка виртуальных локальных сетей на OpenWRT
Настройка виртуальных локальных сетей в OpenWRT включает в себя несколько простых шагов. Этот процесс позволит вам использовать все преимущества сегментации сети и повысить ее эффективность.
Доступ к интерфейсу маршрутизатора: Подключите компьютер к маршрутизатору с помощью кабеля Ethernet. Откройте веб-браузер и введите IP-адрес маршрутизатора. Войдите в систему, используя свои учетные данные.
Перейдите в раздел "Настройки сети".: После входа в систему перейдите в раздел сетевых настроек. Найдите параметры настройки VLAN.
Создание виртуальных локальных сетей: Добавьте новые виртуальные локальные сети в соответствии с планом сегментации сети. Присвойте каждой VLAN уникальный идентификатор и убедитесь, что она соответствует правильному диапазону сети.
Назначение портов: Определите, какие порты маршрутизатора будут входить в каждую VLAN. Вы можете помечать или не помечать порты в зависимости от ваших требований. Помеченные порты передают трафик для нескольких VLAN, а непомеченные порты передают трафик для одной VLAN.
Настройка интерфейсов VLAN: Настройте интерфейсы для каждой виртуальной локальной сети. Назначьте IP-адреса и при необходимости настройте параметры DHCP. Убедитесь, что у каждой VLAN есть своя подсеть, чтобы избежать конфликтов.
Тестирование и мониторинг: После настройки VLAN протестируйте сеть, чтобы убедиться, что все работает так, как ожидалось. Отслеживайте трафик, чтобы выявить любые проблемы и при необходимости внести коррективы.
Интегрировав VLAN в настройку OpenWRT, вы создадите более организованное и безопасное сетевое окружение. Такая конфигурация не только повышает производительность, но и обеспечивает лучший контроль над сетевым трафиком, что делает ее важным шагом в расширении сети с помощью второго маршрутизатора OpenWRT.
Поиск и устранение неисправностей
При расширении сети за счет второго маршрутизатора OpenWRT вы можете столкнуться с некоторыми распространенными проблемами. Понимание того, как устранить эти неполадки, поможет вам поддерживать бесперебойную и эффективную работу сети.
Проблемы с подключением
При подключении второго маршрутизатора к сети могут возникнуть проблемы с подключением. Вот несколько шагов для решения этих проблем:
Проверьте физические соединения: Убедитесь, что все кабели надежно подключены. Убедитесь, что кабель Ethernet соединяет порты LAN обоих маршрутизаторов. Неплотное соединение может нарушить связь с сетью.
Проверка настроек IP-адреса: Убедитесь, что второй маршрутизатор имеет статический IP-адрес в той же подсети, что и основной маршрутизатор. Чтобы избежать конфликтов IP-адресов, убедитесь, что адрес находится вне диапазона DHCP основного маршрутизатора.
Отключите DHCP на втором маршрутизаторе: Если DHCP активен на обоих маршрутизаторах, это может привести к конфликтам IP-адресов. Убедитесь, что DHCP отключен на втором маршрутизаторе, чтобы основной маршрутизатор мог управлять IP-адресами.
Тестовый доступ в Интернет: Подключите устройство ко второму маршрутизатору и проверьте наличие доступа в Интернет. Если соединение отсутствует, перезагрузите оба маршрутизатора и проверьте снова.
Обзор настроек беспроводной сети: Убедитесь, что настройки SSID и безопасности совпадают с настройками основного маршрутизатора. Такая конфигурация позволяет устройствам беспрепятственно переключаться между маршрутизаторами.
"Теперь, когда вы сможете подключиться к Интернету таким образом (скрестите пальцы - я потерпел полное фиаско с некоторыми комбинациями маршрутизаторов), вы сможете назначить квоту для 192.168.1.2. Все ваши гости входят в систему через этот маршрутизатор, и их пропускная способность ограничена". - Воспитанный черепахами
Узкие места в производительности
Узкие места в производительности могут препятствовать эффективности вашей сети. Решите эти проблемы с помощью следующих шагов:
Анализ сетевого трафика: Используйте средства мониторинга сети для выявления устройств или приложений, потребляющих чрезмерную пропускную способность. Такой анализ поможет определить источники перегрузки.
Оптимизация выбора канала: Помехи от соседних сетей могут замедлить работу вашего WiFi. Используйте анализатор WiFi, чтобы выбрать наименее загруженный канал для маршрутизаторов. оптимизируйте выбор канала
Настройка квот на пропускную способность: Если определенные устройства или пользователи потребляют слишком много полосы пропускания, подумайте о том, чтобы установить квоты. Назначьте определенный лимит пропускной способности IP-адресу второго маршрутизатора, например 192.168.1.2, чтобы эффективно управлять гостевым использованием.
Обновление микропрограммы: Убедитесь, что на обоих маршрутизаторах установлена последняя версия прошивки. Обновления часто включают в себя улучшения производительности и исправления ошибок.
Регулярно перезагружайтесь: Периодические перезагрузки могут устранить временные проблемы и повысить производительность. Запланируйте регулярные перезагрузки для обоих маршрутизаторов, чтобы поддерживать оптимальную работу.
Устранив проблемы с подключением и узкие места в производительности, вы сможете обеспечить бесперебойную работу расширенной сети. Эти шаги по устранению неполадок помогут вам поддерживать надежную и эффективную сетевую среду.
Оптимизация производительности сети
Повышение производительности сети включает в себя тонкую настройку параметров и контроль трафика. Регулируя расширенные настройки и отслеживая сетевую активность, вы сможете обеспечить бесперебойную и эффективную работу в Интернете.
Настройка дополнительных параметров
Чтобы оптимизировать работу сети, вам следует изучить расширенные настройки маршрутизатора OpenWRT. Эти настройки позволяют настроить сеть для повышения производительности и надежности. Вот как их можно настроить:
Качество обслуживания (QoS): Включите QoS, чтобы определить приоритетность полосы пропускания для критически важных приложений. Эта функция гарантирует, что важные задачи, такие как видеозвонки или игры, получат необходимую полосу пропускания, уменьшая задержки и буферизацию.
Мощность передачи: Отрегулируйте мощность передачи маршрутизатора, чтобы повысить уровень сигнала. Увеличение мощности может расширить зону покрытия, но также может вызвать помехи. Найдите баланс, подходящий для вашей среды.
Ширина канала: Установите ширину канала 20 МГц или 40 МГц в зависимости от потребностей вашей сети. Более широкий канал может увеличить скорость, но также может привести к помехам. Выберите ширину, которая обеспечивает наилучшую производительность без ущерба для стабильности.
Производительность VPN: Если вы используете VPN, оптимизируйте его работу, используя параметры настройки. Настройте такие параметры, как уровень шифрования и местоположение сервера, чтобы повысить скорость и надежность. Устраняйте распространенные неполадки, чтобы поддерживать безопасное и быстрое соединение.
Обновления прошивки: Регулярно обновляйте встроенное программное обеспечение маршрутизатора. Обновления часто включают в себя улучшения производительности и исправления безопасности, обеспечивая бесперебойную и безопасную работу вашей сети.
Настроив эти дополнительные параметры, вы сможете адаптировать свою сеть под конкретные нужды, обеспечив более надежный и эффективный интернет.
Мониторинг сетевого трафика
Наблюдение за сетевым трафиком поможет вам выявить потенциальные проблемы и оптимизировать производительность. Инструменты мониторинга дают представление о том, как используется ваша сеть и где можно внести улучшения. Вот как можно эффективно контролировать свою сеть:
Средства мониторинга сети: Для отслеживания сетевой активности используйте такие инструменты, как Wireshark или встроенные в OpenWRT функции мониторинга. Эти инструменты помогут вам выявить устройства, потребляющие чрезмерную полосу пропускания, и обнаружить необычные схемы трафика.
Анализ трафика: Анализируйте данные, полученные с помощью инструментов мониторинга. Ищите устройства или приложения, которые могут вызывать перегрузку. Понимание закономерностей трафика позволит вам принимать обоснованные решения о распределении полосы пропускания и конфигурации сети.
Квоты на пропускную способность: Внедрите квоты на пропускную способность для управления ее использованием. Назначьте лимиты для определенных устройств или пользователей, чтобы предотвратить монополизацию сети одним субъектом. Эта стратегия обеспечивает справедливое распределение ресурсов и поддерживает общую производительность.
Регулярные обзоры: Проводите регулярный анализ сетевого трафика. Периодические оценки помогут вам быть в курсе изменений в характере использования и оперативно решать проблемы.
Мониторинг сетевого трафика позволяет получить ценные сведения о производительности сети. Эта информация позволяет вносить коррективы, повышающие эффективность и обеспечивающие бесперебойную работу интернета для всех пользователей.
ЧАСТО ЗАДАВАЕМЫЕ ВОПРОСЫ
Расширение сети за счет второго маршрутизатора OpenWRT может вызвать ряд вопросов. Здесь мы рассмотрим некоторые распространенные вопросы, чтобы помочь вам без проблем справиться с этим процессом.
1. Что такое OpenWRT?
OpenWRT - это мощная операционная система на базе Linux, предназначенная для встраиваемых устройств, таких как маршрутизаторы. Она предлагает широкие возможности настройки и поддерживает широкий спектр оборудования. Пользователи часто выбирают OpenWRT за ее гибкость и надежную производительность. С помощью OpenWRT вы можете превратить свой маршрутизатор в универсальное сетевое устройство.
2. Почему я должен использовать второй маршрутизатор OpenWRT?
Добавление второго маршрутизатора OpenWRT может увеличить зону покрытия и производительность вашей сети. Он позволяет расширить зону покрытия WiFi, более эффективно управлять полосой пропускания и создавать отдельные сегменты сети с помощью VLAN. Такая настройка может улучшить работу в Интернете за счет уменьшения мертвых зон и оптимизации подключения.
3. Как настроить второй маршрутизатор как точку доступа Dumb AP?
Чтобы настроить второй маршрутизатор как точку доступа Dumb Access Point (AP), выполните следующие действия:
- Отключить DHCP: Зайдите в интерфейс маршрутизатора и отключите DHCP-сервер. Это действие предотвращает конфликты IP-адресов.
- Назначение статического IP-адреса: Установите статический IP-адрес в той же подсети, что и основной маршрутизатор, но вне его диапазона DHCP.
- Подключение через Ethernet: С помощью кабеля Ethernet соедините порты LAN обоих маршрутизаторов. Такое соединение обеспечивает стабильную передачу данных.
4. Можно ли использовать разные модели маршрутизаторов для этой настройки?
Да, вы можете использовать разные модели маршрутизаторов, но убедитесь, что они совместимы с OpenWRT. Хотя использование одной и той же марки и модели может упростить интеграцию, разные модели могут работать, если они поддерживают необходимые функции и работают с совместимыми версиями OpenWRT.
5. Как мне устранение проблем с подключением?
Если у вас возникли проблемы с подключением, попробуйте следующие решения:
- Проверьте соединения: Убедитесь, что все кабели надежно подключены.
- Проверка параметров IP: Убедитесь, что второй маршрутизатор имеет статический IP-адрес в нужном диапазоне.
- Обзор настроек беспроводной сети: Убедитесь, что настройки SSID и безопасности совпадают с настройками основного маршрутизатора.
6. Подходит ли OpenWRT для новичков?
OpenWRT может показаться сложным для новичков из-за интерфейса командной строки. Однако он предлагает графический интерфейс пользователя (GUI) для более удобного управления. Многие пользователи считают изучение и использование OpenWRT полезным, поскольку он обеспечивает широкий контроль над сетевыми настройками.
"Я использую OpenWRT в течение два года и... я даже не знаю, о чем вы говорите. Я использовал тот же самый ноутбук, подключенный через (я думаю) гигабитный Ethernet к оптоволокну, и я не заметил разницы в использовании с "отстойным OpenWRT"."
7. Как я могу оптимизировать производительность моей сети?
Чтобы оптимизировать производительность, воспользуйтесь следующими советами:
- Включить QoS: Определите приоритет полосы пропускания для критически важных приложений.
- Регулировка мощности передачи: Повысьте уровень сигнала, изменив настройки мощности передачи.
- Мониторинг трафика: Используйте инструменты для отслеживания сетевой активности и выявления "заторов" пропускной способности.
Изучив эти часто задаваемые вопросы, вы сможете с уверенностью расширить свою сеть вторым маршрутизатором OpenWRT, повысив качество работы в Интернете.
Вы успешно расширили свою сеть за счет второго маршрутизатора OpenWRT. Для этого нужно было понять потребности сети, подготовить необходимое оборудование и эффективно настроить оба маршрутизатора. Чтобы поддерживать и оптимизировать работу расширенной сети, регулярно обновляйте прошивку и следите за сетевым трафиком. Рассмотрите возможность дальнейшей настройки OpenWRT. Его гибкость позволяет адаптировать сеть к конкретным потребностям. Помните, что OpenWRT предлагает широкие функциональные возможности, но при этом остается удобной для пользователя. Благодаря этому балансу его возможности могут использовать как новички, так и опытные пользователи. Продолжайте изучать и совершенствовать свою сеть для оптимального использования интернета.