You want to unlock the full potential of your fiber optic internet. This guide helps you complete the setup for your new OpenWRT fiber router. You can achieve this goal by following two main steps.
The solution requires you to configure the PPPoE protocol and set the correct VLAN ID for your connection.
This guide gives you the exact instructions. You will use the OpenWRT interface to gain faster speeds and more network control.
Gathering Your Essentials
Before you configure your router, you need to collect a few key items. Having these ready will make the setup process smooth and fast. Let’s walk through what you need.
Your OpenWRT Fiber Router
Your router is the heart of your network. A powerful openwrt fiber router ensures you get every bit of speed from your connection. For top performance, you should look for a device with a modern dual-core CPU and at least 512MB of RAM. These specifications help your router handle gigabit speeds without slowing down.
You can find excellent devices from specialized manufacturers. For example, HUASIFEI has been developing advanced networking equipment since 2012 and offers a great range of OpenWRT-compatible routers. Choosing a quality openwrt fiber router is your first step toward a better network.
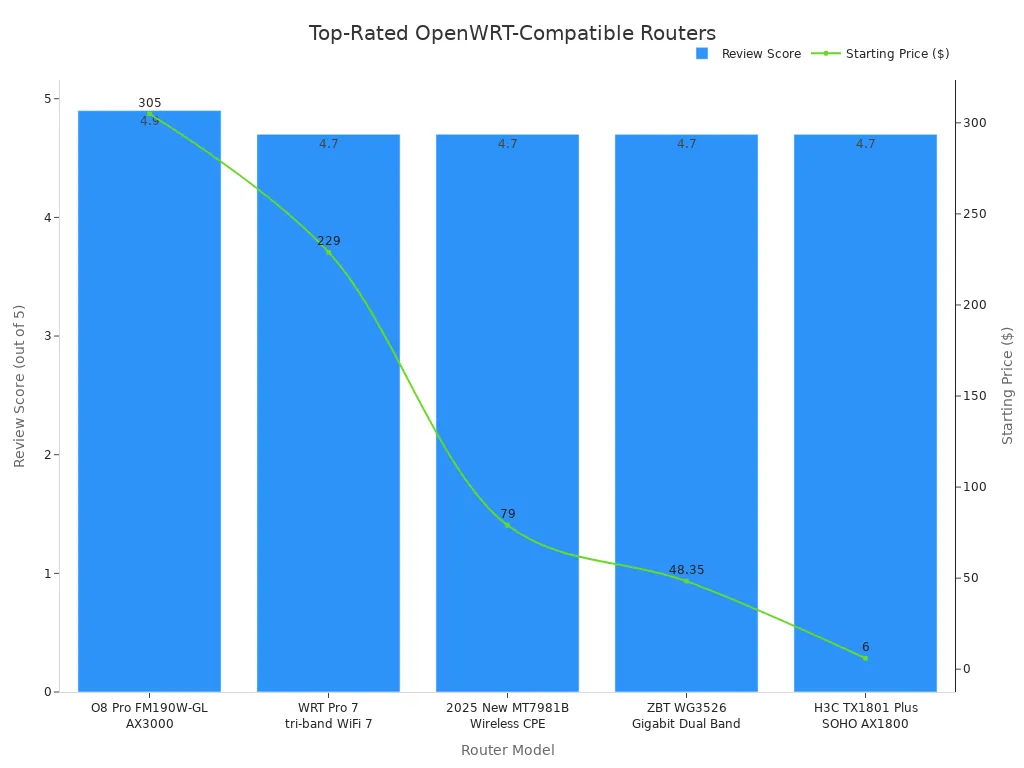
Here are some top-rated options to consider:
| Product Name | Review Score | Key Attributes |
|---|---|---|
| O8 Pro AX3000 OpenWRT Mesh 5G CPE | 4.9 | WiFi 6, 5G Modem, Gigabit Ports |
| WRT Pro 7 tri-band WiFi 7 router | 4.7 | WiFi 7, 2.5G WAN, 10680Mbps |
| 2025 New MT7981B Wireless CPE 5G | 4.7 | 5G/4G, WiFi 6, SIM Slot |
PPPoE Credentials
Your Internet Service Provider (ISP) uses PPPoE credentials to authorize your connection. This is simply a username and password specific to your account. You usually receive this information when a technician installs your service. If you don’t have it, you can get it by calling your ISP’s support line.
Anmerkung: 📝 Be aware that some ISPs may be reluctant to share these details. You may need to be persistent to get the information you need for your setup.
Required VLAN ID
The VLAN ID is a number that separates your data from other customers on the network. Your router needs this ID to correctly tag your traffic. Without the right VLAN ID, your fiber optic internet connection will not work. Your ISP’s Optical Network Terminal (ONT) uses this tag to manage your service.
You can find your VLAN ID in a few places:
- Check your ISP’s official website or help section.
- Ask the installation technician.
- Search online forums for your specific ISP. For example, CenturyLink often uses VLAN
201, while some UK providers use101.
Accessing the LuCi Interface
With your credentials ready, you can now connect to your router and access its web interface. This interface, called LuCi, is your control panel for all router settings. You will use LuCi to configure your fiber connection.
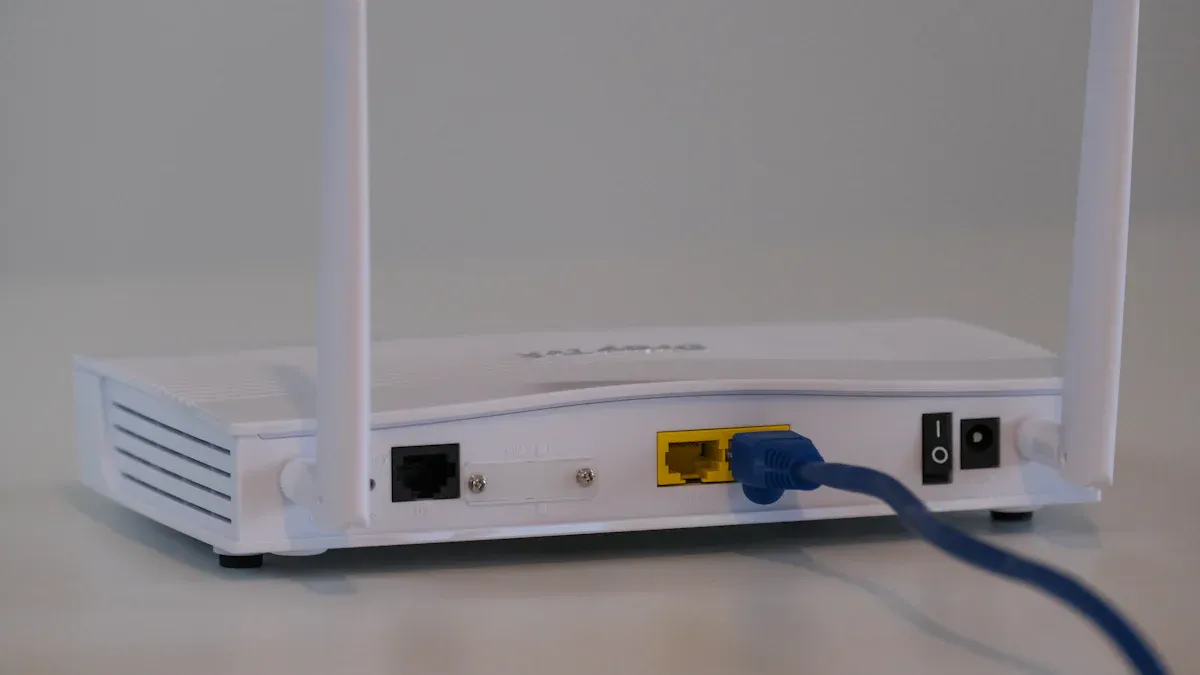
Initial Router Connection
First, you need to establish a direct physical connection to your new router. This ensures you can access the settings panel without any interference. Follow these simple steps to get connected.
- Power On Your Router: Plug your router into a power outlet and turn it on. Wait a minute for it to fully boot up.
- Verbinden Sie Ihren Computer: Use an Ethernet cable to connect your computer directly to one of the router’s
LANports. Do not use theWANport for this step. - Öffnen Sie einen Webbrowser: Launch your preferred web browser, such as Chrome, Firefox, or Safari, on the connected computer.
Navigating to Advanced Settings
Now you will navigate to the router’s login page. Every router has a default IP address that you can type into your browser to access its settings.
Tipp: 💡 Most new openwrt installations use a default IP address. You can try one of the following common addresses:
192.168.1.1(This is the most common default.)192.168.2.1(Some specific images, like Seeed’s, use this.)
Typ 192.168.1.1 into your browser’s address bar and press Enter. You should see the LuCi login screen. The system will ask for a username and password.
- Username:
Wurzel - Passwort: Leave this field blank.
After you log in, you will see the LuCi status overview page. You are now ready to configure the advanced settings for your fiber internet.
Configuring OpenWRT for Fiber
You are now logged into LuCi and ready for the main event. This section guides you through the two critical steps for your fiber optic internet connection: setting the PPPoE protocol and applying the correct VLAN tag. Follow these instructions carefully to unlock your network’s full potential.
Set PPPoE Protocol
Your router must speak the right language to communicate with your ISP. This language is the PPPoE protocol. You will now configure your router to use it.
- Navigate to Interfaces: In the top menu, go to
Netzwerkand then click onSchnittstellen. - Edit the WAN Interface: You will see a list of interfaces. Find the one named
WANand click thebearbeitenbutton next to it. - Choose the Protocol: On the
General Setuptab, find theProtocoldropdown menu. Click it and selectPPPoE. - Enter Your Credentials: After you select PPPoE, new fields will appear. Enter the
UsernameundPasswortyou got from your ISP into thePAP/CHAP usernameundPasswortfields.
Advanced Tip: 💡 To keep your connection stable, you can adjust the
Keepalivesettings. In theErweiterte Einstellungentab of the WAN interface, you will findLCP echo failure thresholdundLCP echo interval. These settings act like a health check. The router sends a small “ping” (LCP echo) to the ISP’s server. If the server doesn’t reply after a certain number of tries, the router knows the connection is down and tries to reconnect. A good starting point is setting the failure threshold to a high number like100and the interval to5. This tells the router to be very patient before assuming the connection is dead.
Do not click “Save & Apply” just yet. You still need to configure the VLAN tagging in the next step.
Apply VLAN Tagging
Your ISP uses a VLAN ID to deliver service from their Optical Network Terminal (ONT) to your specific account. Configuring VLAN tagging tells your router how to label your internet traffic so the network recognizes it.
- Go to Physical Settings: While still editing the
WANinterface, click on thePhysical Settingstab. - Define the Custom Interface: You need to attach the WAN interface to a specific VLAN-tagged device. Instead of choosing from the
Schnittstelledropdown, you will type directly into theCustom Interfacebox. - Enter Your VLAN Tag: Typ
eth0.followed by your VLAN ID. For example, if your ISP uses VLAN201, you would entereth0.201. Dieeth0part usually refers to your physical WAN port.
This process uses the router’s CPU to manage the VLAN tags. This is known as software-based tagging. For most home users, this is perfectly fine. However, it’s useful to understand how it compares to hardware-based tagging, which offloads the work to a dedicated chip.
| Feature/Method | Performance Characteristic | Implication for VLAN Tagging |
|---|---|---|
| CPU-based routing (software) | Slower; limited by CPU speed | Your router’s processor handles all traffic tagging, which can create a bottleneck at very high speeds. |
| Hardware-based switching | Operates at full line speed (~930 MBit/s) | A dedicated switch chip handles tagging, freeing up the CPU and allowing for maximum throughput. |
Your openwrt fiber router is powerful, but this software-based method is important to understand. For this guide, we are focusing on the simple and effective CPU-based method.
Speichern und Anwenden
You have now entered all the necessary information. It is time to save your settings and bring your new connection online.
- Klicken Sie auf die
Speichern & Anwendenbutton at the bottom right of the page. - OpenWrt will now apply your new network configuration. This may take up to a minute.
- In some cases, a full reboot helps the settings take effect properly. You can reboot your router by going to
System>Reboot.
After your router applies the settings or reboots, your internet should be active. You can verify this by checking the ppp0 interface status.
You can check the connection status by logging into your router via SSH and running the
ip acommand. A successful connection will show an IP address and anUPstatus forppp0:4: ppp0: <POINTOPOINT,MULTICAST,NOARP,UP,LOWER_UP> mtu 1492 qdisc pfifo_fast state UNKNOWN inet 10.40.1.15 peer 10.40.0.1/32 scope global ppp0
If the connection fails, you can check the system log (System > System-Protokoll) for clues. Common error messages include:
CHAP authentication failed: This means your PPPoE username or password is incorrect. Double-check your credentials.Unable to complete PPPoE Discovery: Your router cannot find the ISP’s server. This could be a VLAN issue or a physical connection problem.LCP terminated by peer: The ISP’s server ended the connection. This often happens right after an authentication failure.
If you see these errors, carefully review your settings for the pppoe protocol and VLAN ID. Ensuring these two configurations are correct solves the vast majority of connection problems on a new openwrt setup.
You have successfully configured your openwrt fiber router. You followed the key steps for setting the PPPoE protocol and applying the correct VLAN tag. Your network now has incredible new capabilities. You can enjoy:
- Full Fiber Speed: Access the maximum speed your internet plan offers.
- Erhöhte Sicherheit: Install packages like ad-blockers or set up a robust firewall.
- Powerful Customization: Use features like VPNs for privacy or QoS to prioritize traffic.
You have taken full control of your home network. Enjoy the faster, safer, and more flexible internet experience you built.
FAQ
What if my ISP uses a different WAN port?
Some router models use a different physical port for the WAN connection. If eth0.201 does not work, you can try eth1.201. You can find the correct port name by checking your router’s documentation or looking at the Netzwerk > Schnittstellen > Geräte tab in LuCi.
Why is my internet speed still slow after setup?
Your slow speed might be due to an old Ethernet cable. Ensure you use a CAT5e or CAT6 cable between your ISP’s optical network terminal (ont) and your router’s WAN port. Also, check your computer’s connection to the router for any bottlenecks.
Can I use this guide for a non-fiber connection?
This guide is specific to fiber internet that uses PPPoE and VLAN tagging. Cable or DSL connections often use a different protocol, like DHCP. You would need to select DHCP client as the protocol for the WAN interface instead of PPPoE.
How do I update my router’s firmware?
You can update OpenWRT to get new features and security patches.
- Gehe zu
System>Backup / Flash Firmware. - Under
Flash new firmware image, upload the new firmware file. - Klicken Sie auf
Flash imageand follow the prompts.
Wichtig: ⚠️ Always download firmware from the official OpenWRT website or your router manufacturer’s trusted source to avoid issues.