
Setting up an OpenWRT router on a Raspberry Pi gives you the power to transform your network. OpenWRT, known for its flexibility and advanced features, allows you to customize your router settings to meet your specific needs. You can enjoy enhanced security, improved performance, and access to a vast community for support. Whether you’re using a car wifi router 5g, one of the openwrt supported routers, or a device from a trusted industrial router manufacturer, lte router manufacturero fabricante de routers 5g, this setup is a great choice. Brands like HUASIFEI provide reliable options for both business router solution y home router solutionincluyendo industrial router models. Unlike traditional setups, this process is cost-effective and beginner-friendly. By following this guide, you’ll unlock the full potential of your Raspberry Pi and take control of your home network.
Principales conclusiones
- Transforme su Raspberry Pi en un potente router con OpenWRT, mejorando la seguridad y el rendimiento de su red.
- Reúna el hardware esencial, como una Raspberry Pi, una tarjeta MicroSD y cables Ethernet, para garantizar un proceso de configuración sin problemas.
- Sigue las instrucciones paso a paso para formatear la tarjeta SD y flashear la imagen OpenWRT para preparar tu dispositivo.
- Accede fácilmente a la interfaz web OpenWRT conectándote a la dirección IP predeterminada, lo que permite una configuración sencilla.
- Personaliza tu red configurando interfaces WAN y LAN, activando DHCP y configurando los ajustes del cortafuegos para mayor seguridad.
- Explora funciones avanzadas como la configuración de VPN y herramientas de supervisión de red para optimizar el rendimiento de tu router.
- Utiliza el soporte y los recursos de la comunidad para solucionar cualquier problema, asegurándote de que tu router OpenWRT funciona de forma eficiente.
Requisitos de hardware y software para un router OpenWRT
Before setting up your OpenWRT router on a Raspberry Pi, you need to gather the right hardware and software. Having the correct tools ensures a smooth installation process and optimal performance.
Hardware esencial
Para construir tu router OpenWRT, necesitarás los siguientes componentes de hardware:
- Raspberry Pi: Choose a Raspberry Pi models that meets your performance needs. The Raspberry Pi 4 (4 GB RAM) es una excelente elección por su gran capacidad de procesamiento y su puerto Ethernet integrado. Para tareas básicas, el Raspberry Pi 5 (2 GB RAM) ofrece una alternativa económica.
- Tarjeta MicroSD: Use a reliable MicroSD card with at least 8 GB of storage. This will hold the OpenWRT operating system and configuration files.
- Fuente de alimentación: Ensure stable operation by using an official Raspberry Pi power adapter. Low-quality power supplies can cause instability or even damage your Raspberry Pi.
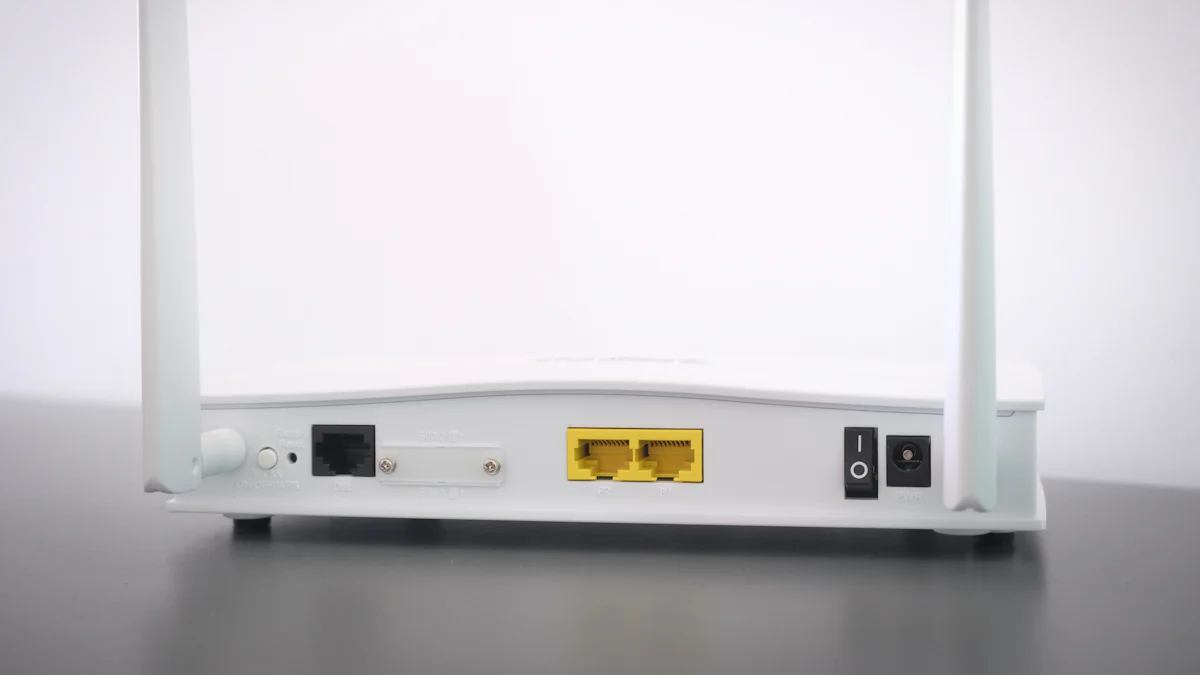
- Cables Ethernet: At least two Ethernet cables are necessary. One connects your Raspberry Pi to the modem, while the other links it to your devices or a network switch.
- Adaptador USB a Ethernet: Si tu Raspberry Pi solo tiene un puerto Ethernet, un adaptador USB a Ethernet añade un puerto extra para conexiones WAN o LAN.
- Solución de refrigeración: Consider using a cooling fan or heat sinks to prevent overheating during extended use, especially in warm environments.
Herramientas de software recomendadas
Las herramientas de software que elija desempeñan un papel fundamental en la preparación e instalación de OpenWRT en su Raspberry Pi. Esto es lo que necesitarás:
- Imagen OpenWRT: Descargue la imagen OpenWRT adecuada para su modelo específico de Raspberry Pi desde el sitio web oficial de OpenWRT. Asegúrate de seleccionar la versión correcta para evitar problemas de compatibilidad.
- Herramienta intermitente: Utilice una herramienta fiable como Grabador o Generador de imágenes de disco Win32 para flashear la imagen OpenWRT en tu tarjeta MicroSD. Estas herramientas simplifican el proceso y reducen el riesgo de errores.
- Cliente SSH: Acceda a la interfaz OpenWRT utilizando un cliente SSH como PuTTY (para Windows) o el terminal integrado (para macOS y Linux). Esto te permite configurar los ajustes del router de forma eficiente.
- Navegador web: Un navegador web moderno como Google Chrome o Mozilla Firefox es esencial para acceder a la interfaz web de OpenWRT tras la instalación.
Al reunir estos componentes de hardware y herramientas de software, estarás totalmente preparado para configurar tu router OpenWRT. Esta preparación garantiza una experiencia fluida y le ayuda a liberar todo el potencial de su Raspberry Pi como potente dispositivo de red.
Preparación de la Raspberry Pi para OpenWRT
Before you can transform your Raspberry Pi into an OpenWRT router, you need to prepare it properly. This involves formatting the SD card, flashing the OpenWRT image, and setting up the hardware. Each step ensures that your Raspberry Pi is ready for a smooth installation process.
Formateo de la tarjeta SD
El primer paso para preparar tu Raspberry Pi es formatear la tarjeta MicroSD. Una tarjeta SD limpia y correctamente formateada asegura que la imagen OpenWRT se instale sin errores. Sigue estos pasos para formatear tu tarjeta SD:
- Inserte la tarjeta SD: Utilice un lector de tarjetas SD para conectar la tarjeta MicroSD al ordenador.
- Elija una herramienta de formato: Descargue e instale una herramienta de formateo fiable como Formateador de tarjetas SD. Esta herramienta está diseñada específicamente para tarjetas SD y garantiza un rendimiento óptimo.
- Seleccione la tarjeta SD: Abra la herramienta de formateo y seleccione la unidad correspondiente a su tarjeta SD. Compruebe dos veces para evitar formatear la unidad equivocada.
- Formatear la tarjeta: Elija la opción "Formato rápido" e inicie el proceso. Esto borra todos los datos y prepara la tarjeta para la imagen OpenWRT.
Consejo: Utilice siempre una tarjeta SD de alta calidad con suficiente capacidad de almacenamiento (al menos 8 GB) para evitar problemas de rendimiento durante y después de la instalación.
Descarga y flasheo de la imagen OpenWRT
Una vez formateada la tarjeta SD, el siguiente paso es descargar y flashear la imagen OpenWRT. Este paso instala el sistema operativo OpenWRT en tu tarjeta SD.
- Descargar la imagen de OpenWRT: Visite el sitio web oficial de OpenWRT y descargue el archivo de imagen para su modelo específico de Raspberry Pi. Asegúrate de seleccionar la versión correcta para evitar problemas de compatibilidad.
- Instalar una herramienta de intermitencia: Utilice una herramienta de flasheo de confianza como Grabador o Generador de imágenes de disco Win32. Estas herramientas simplifican el proceso y reducen el riesgo de errores.
- Flashear la imagen:
- Abra la herramienta de flasheo y seleccione el archivo de imagen OpenWRT descargado.
- Elija la tarjeta SD formateada como unidad de destino.
- Inicia el proceso de flasheo. Esto escribe la imagen OpenWRT en la tarjeta SD.
Importante: Verifique la integridad del archivo de imagen descargado comprobando su suma de comprobación. Esto garantiza que el archivo no está dañado.
Configuración inicial del hardware
Después de preparar la tarjeta SD, es necesario configurar el hardware Raspberry Pi. Una configuración adecuada del hardware garantiza que tu router OpenWRT funcione de forma eficiente.
- Inserte la tarjeta SD: Coloque la tarjeta SD flasheada en la ranura para tarjetas SD de la Raspberry Pi.
- Conectar los cables Ethernet:
- Conecta un cable Ethernet desde tu módem al puerto Ethernet de la Raspberry Pi. Esto sirve como conexión WAN.
- Si tu Raspberry Pi sólo tiene un puerto Ethernet, utiliza un adaptador USB a Ethernet para la conexión LAN.
- Conectar la fuente de alimentación: Conecta el adaptador de corriente oficial de Raspberry Pi para garantizar un suministro de energía estable.
- Refrigeración opcional: Instale un ventilador de refrigeración o disipadores de calor para evitar el sobrecalentamiento, especialmente si tiene previsto utilizar el router durante periodos prolongados.
Consejo profesional: Coloque su Raspberry Pi en un área bien ventilada para mantener un rendimiento óptimo y evitar el sobrecalentamiento.
Al completar estos pasos, preparas tu Raspberry Pi para la instalación de OpenWRT. Esta preparación sienta las bases para un router OpenWRT fiable y eficiente, dándole un control total sobre su red.
Instalación de OpenWRT en la Raspberry Pi

Una vez que hayas preparado tu Raspberry Pi, es hora de instalar OpenWRT y dar vida a tu router openwrt. Esta sección te guiará para arrancar OpenWRT y acceder a su interfaz web por primera vez. Estos pasos son sencillos y están diseñados para principiantes, por lo que puedes seguirlos incluso si eres nuevo en el mundo de las redes.
Arrancar en OpenWRT
Arrancar en OpenWRT es el primer paso para transformar tu Raspberry Pi en un router totalmente funcional. Sigue estos pasos para garantizar un arranque sin problemas:
- Encender la Raspberry Pi: Inserte la tarjeta MicroSD con la imagen OpenWRT en la Raspberry Pi. Conecta la fuente de alimentación para encenderla. La Raspberry Pi arrancará automáticamente desde la tarjeta SD.
- Conectarse a la red: Utilice un cable Ethernet para conectar su Raspberry Pi a su ordenador o a un switch. Esta conexión le permite acceder a la interfaz OpenWRT.
- Esperar al proceso de arranque: Deje que la Raspberry Pi unos minutos para completar el proceso de arranque. Durante este tiempo, inicializa el sistema operativo OpenWRT.
Consejo: Si tiene problemas durante el arranque, vuelva a comprobar la preparación de la tarjeta SD. Asegúrate de que la imagen OpenWRT se ha flasheado correctamente y de que la tarjeta está bien insertada.
Una vez que la Raspberry Pi arranque correctamente, se asignará una dirección IP por defecto, normalmente 192.168.1.1. Esta dirección es esencial para acceder a la interfaz OpenWRT.
Acceso a la interfaz web de OpenWRT
La interfaz web de OpenWRT es donde configurarás y gestionarás tu router. Proporciona una plataforma fácil de usar para configurar tu red. A continuación te explicamos cómo acceder a ella:
- Abrir un navegador web: Inicie un navegador web moderno como Google Chrome o Mozilla Firefox en su ordenador.
- Introduzca la dirección IP por defecto: Tipo
192.168.1.1en la barra de direcciones del navegador y pulse Intro. Esto te llevará a la página de inicio de sesión de OpenWRT. - Iniciar sesión en OpenWRT: Utilice las credenciales de inicio de sesión predeterminadas. Normalmente, el nombre de usuario es
raízy no hay ninguna contraseña establecida inicialmente. Después de iniciar sesión, se te pedirá que establezcas una contraseña segura.
Consejo profesional: Establezca siempre una contraseña segura durante la configuración inicial para proteger su router de accesos no autorizados.
- Explorar el panel de control: Una vez conectado, verás el panel de control de OpenWRT. Esta interfaz te da acceso a varios ajustes, como la configuración de red, las reglas del cortafuegos y la configuración inalámbrica.
Si no puede acceder a la interfaz web, compruebe la configuración de su red. Asegúrese de que su ordenador está en la misma subred que la Raspberry Pi. Es posible que tenga que configurar manualmente la dirección IP de su ordenador para que coincida con la 192.168.1.x gama.
Al completar estos pasos, habrás arrancado con éxito en OpenWRT y habrás accedido a su interfaz web. Esto marca el comienzo de tu viaje hacia la personalización y optimización de tu red.
Configuración del router OpenWRT
Configurar tu router OpenWRT es un paso crucial para asegurar una conectividad a Internet sin problemas y una gestión eficiente de tu red. Esta sección le guiará a través de la configuración de interfaces WAN y LAN, la habilitación de DHCP y firewall, y la configuración de redes inalámbricas.
Configuración de interfaces WAN y LAN
To establish a reliable internet connection and manage local devices effectively, you need to configure the WAN (Wide Area Network) and LAN (Local Area Network) interfaces. These interfaces serve as the backbone of your network.
- Acceder a la interfaz OpenWRT: Inicie sesión en la interfaz web de OpenWRT introduciendo
192.168.1.1en su navegador. Utilice las credenciales que estableció durante la configuración inicial. - Vaya a Ajustes de red: Haz clic en la pestaña "Red" y selecciona "Interfaces". Aquí verás las interfaces WAN y LAN por defecto.
- Configurar la interfaz WAN:
- Edite la interfaz WAN haciendo clic en el botón "Editar".
- Configure el protocolo para que coincida con los requisitos de su proveedor de servicios de Internet (por ejemplo, DHCP, PPPoE).
- Define the IP address, subnet mask, default gateway, and DNS servers if required.
- Guarde y aplique los cambios.
- Configurar la interfaz LAN:
- Edite la interfaz LAN y asígnele una dirección IP estática (p. ej,
192.168.1.1). - Especifique la máscara de subred para definir el rango de direcciones IP de su red local.
- Guarde y aplique los cambios.
Consejo: Configuring these interfaces properly ensures your Raspberry Pi delivers reliable and secure network connectivity.
Activación de DHCP y Firewall
El servidor DHCP (Dynamic Host Configuration Protocol) y el cortafuegos son esenciales para gestionar las direcciones IP y proteger la red.
- Habilitar el servidor DHCP:
- Ve a la pestaña "Red" y selecciona "Interfaces".
- En la interfaz LAN, active el servidor DHCP. Esto permite al router asignar direcciones IP automáticamente a los dispositivos de la red.
- Especifique el intervalo de direcciones IP para el servidor DHCP (p. ej,
192.168.1.100a192.168.1.200). - Guarde y aplique los ajustes.
- Configurar el cortafuegos:
- Vaya a la sección "Cortafuegos" en la pestaña "Red".
- Configure zonas de cortafuegos para controlar el tráfico entre las interfaces WAN y LAN. Por ejemplo, permita el tráfico de LAN a WAN y bloquee el tráfico de WAN a LAN.
- Activa NAT (Network Address Translation) para compartir tu conexión a Internet con todos los dispositivos de la LAN.
- Guarde y aplique los cambios.
Consejo profesional: Un cortafuegos correctamente configurado protege su red de accesos no autorizados y amenazas potenciales.
Configuración de redes inalámbricas
Adding wireless functionality to your OpenWRT router enhances its versatility, allowing devices to connect without cables.
- Activar la configuración inalámbrica:
- Ve a la pestaña "Red" y selecciona "Inalámbrico".
- Habilite la radio inalámbrica (por ejemplo, 2,4 GHz o 5 GHz) haciendo clic en el botón "Habilitar".
- Configurar la red inalámbrica:
- Haga clic en "Editar" junto a la interfaz inalámbrica.
- Asigna un SSID (nombre de red) único para identificar tu red inalámbrica.
- Elige el modo inalámbrico (por ejemplo, Punto de Acceso) y el canal adecuados para un rendimiento óptimo.
- Proteger la red inalámbrica:
- En la sección "Seguridad inalámbrica", selecciona WPA2-PSK como método de cifrado.
- Establece una contraseña segura para evitar accesos no autorizados.
- Guarde y aplique los cambios.
Consejos de expertos: El uso de un adaptador WiFi USB puede mejorar las capacidades inalámbricas de tu Raspberry Pi, especialmente si el módulo WiFi integrado tiene un alcance o rendimiento limitados.
Al completar estas configuraciones, transformas tu Raspberry Pi en un router OpenWRT totalmente funcional. Estos pasos garantizan que su red funcione de forma eficiente, segura y fiable.
Pruebas y resolución de problemas del router OpenWRT
Testing and troubleshooting your OpenWRT router ensures that it operates efficiently and meets your network needs. This section will guide you through verifying network connectivity and resolving common issues that may arise during or after the setup process. Testing and troubleshooting
Verificación de la conectividad de red
Asegurarse de que su router OpenWRT está correctamente conectado a Internet y a sus dispositivos es un paso crítico. Siga estos pasos para verificar la conectividad de la red:
Compruebe la conexión WAN:
Log in to the OpenWRT web interface by entering192.168.1.1en su navegador. Navegue hasta la pestaña "Red" y seleccione "Interfaces". Confirme que la interfaz WAN muestra una conexión activa. Busque una dirección IP válida asignada por su proveedor de servicios de Internet (ISP). Si la interfaz WAN muestra "desconectado", vuelva a comprobar la conexión del cable Ethernet entre el módem y la Raspberry Pi.Probar el acceso a Internet:
Connect a device, such as a laptop or smartphone, to the LAN port or wireless network of your OpenWRT router. Open a web browser and visit a website likewww.google.com. Si la página se carga correctamente, su router está proporcionando acceso a Internet. Si no es así, vuelve a revisar la configuración de la interfaz WAN para asegurarte de que coincide con los requisitos de tu ISP.Prueba Ping:
Perform a ping test to confirm connectivity. Open a terminal or command prompt on your connected device and type:
ping 8.8.8.8
Este comando envía paquetes al servidor DNS público de Google. Una respuesta satisfactoria indica que el router se está comunicando con redes externas. Si el ping falla, soluciona el problema de la interfaz WAN o comprueba si hay alguna configuración incorrecta del cortafuegos.
- Verificar las conexiones LAN e inalámbricas: Asegúrese de que los dispositivos conectados a los puertos LAN o a la red inalámbrica pueden comunicarse entre sí. Por ejemplo, intente compartir archivos entre dos dispositivos conectados o acceder a una impresora compartida. Este paso confirma que las interfaces LAN e inalámbricas funcionan correctamente.
Nota: OpenWRT’s lightweight design enhances router performance, ensuring faster data transfer speeds and reliable connectivity compared to default firmware.
Resolución de problemas comunes
Incluso con una configuración cuidadosa, puede encontrarse con problemas. Abordar estos problemas con prontitud asegura que su router OpenWRT funcione de manera óptima.
- Sin acceso a Internet:
- Compruebe que la interfaz WAN está configurada correctamente. Asegúrese de que el protocolo (por ejemplo, DHCP o PPPoE) coincide con los requisitos de su ISP.
- Compruebe las conexiones físicas. Asegúrese de que el cable Ethernet del módem está bien conectado al puerto Ethernet de la Raspberry Pi.
- Reinicia el módem y el router. Los problemas de conectividad temporales suelen solucionarse con ciclos de encendido y apagado.
- No se puede acceder a la Interfaz Web:
- Confirma que tu dispositivo está en la misma subred que el router. Por ejemplo, si la dirección IP del router es
192.168.1.1la IP de su dispositivo debe estar en el campo192.168.1.xgama. - Borre la caché de su navegador o intente acceder a la interfaz utilizando otro navegador.
- Utilice un cliente SSH como PuTTY para conectarse al router y verificar su estado.
- Velocidades de red lentas:
- Comprueba si hay interferencias si utilizas una conexión inalámbrica. Cambia el canal inalámbrico en la interfaz OpenWRT para reducir la congestión.
- Asegúrese de que su Raspberry Pi tiene una refrigeración adecuada. El sobrecalentamiento puede reducir el rendimiento.
- Actualiza a un adaptador WiFi USB si el módulo inalámbrico integrado carece de suficiente alcance o velocidad.
- Dispositivos que no reciben direcciones IP:
- Confirme que el servidor DHCP está activado en la configuración de la interfaz LAN.
- Compruebe el rango de direcciones IP asignado por el servidor DHCP. Asegúrese de que proporciona suficientes direcciones para todos los dispositivos conectados.
- Reinicie el router para actualizar el servicio DHCP.
- Cortafuegos que bloquea el tráfico:
- Revise la configuración del cortafuegos en la interfaz OpenWRT. Asegúrate de que el tráfico de LAN a WAN está permitido mientras restringes el tráfico de WAN a LAN por seguridad.
- Activa NAT (Network Address Translation) para compartir la conexión a Internet con todos los dispositivos de la LAN.
Consejo profesional: El diseño modular de OpenWRT permite instalar paquetes adicionales para mejorar las capacidades de resolución de problemas. Por ejemplo, herramientas como
tcpdumpayudan a analizar el tráfico de red e identificar problemas.
By following these steps, you can resolve most common issues and ensure your OpenWRT router operates smoothly. OpenWRT’s robust features, such as enhanced security and customizability, make it a powerful choice for managing your network. testing OpenWRT routers
Funciones avanzadas y personalizaciones para OpenWRT
OpenWRT offers a wealth of advanced features that allow you to tailor your router to meet specific needs. By exploring these customization options, you can unlock the full potential of your openwrt router and enhance its functionality.
Instalación de paquetes adicionales
Una de las características más destacadas de OpenWRT es su diseño modular, que permite instalar paquetes adicionales para ampliar las capacidades del router. Estos paquetes te permiten añadir nuevas funcionalidades, como herramientas de monitorización de red, bloqueadores de anuncios o incluso servidores multimedia.
Acceder al gestor de paquetes:
Log in to the OpenWRT web interface and navigate to the “System” tab. Select “Software” to access the package manager. This section lists all available and installed packages.Buscar paquetes:
Use the search bar to find specific packages. For example, you can installluci-app-adblockpara bloquear anuncios no deseados en su red oluci-app-statisticspara supervisar el rendimiento de la red.Instalar el paquete:
Click the “Install” button next to the desired package. OpenWRT will download and install it automatically. Once installed, you can configure the package through the web interface or command line.
Consejo profesional: Actualiza regularmente los paquetes instalados para garantizar la compatibilidad y la seguridad. OpenWRT proporciona actualizaciones para mejorar el rendimiento y parchear vulnerabilidades.
Instalando paquetes adicionales, puedes personalizar tu router para adaptarlo a tus preferencias y optimizar tu experiencia en la red.
Configurar una VPN
A Virtual Private Network (VPN) enhances your network’s security by encrypting data and masking your online activities. OpenWRT supports popular VPN protocols like OpenVPN and WireGuard, making it an excellent choice for setting up a secure connection.
Elija un protocolo VPN:
OpenVPN is known for its robust security and flexibility, while WireGuard offers faster speeds and a simpler setup. Both options are reliable and widely supported.Instalar el paquete VPN:
Access the package manager in the OpenWRT interface. Search forluci-app-openvpnoluci-app-wireguarde instale el paquete adecuado.Configurar la VPN:
- Para OpenVPN, cargue el archivo de configuración de su proveedor de VPN o introduzca manualmente los ajustes.
- Para WireGuard, genere un par de claves y configure la interfaz con los datos de su proveedor de VPN.
- Guarde y aplique los ajustes.
- Activar la VPN: Active la conexión VPN a través de la pestaña "Red". Prueba la conexión para asegurarte de que funciona correctamente.
Consejos de expertos: Configurar una VPN en tu router OpenWRT protege todos los dispositivos de tu red, eliminando la necesidad de configurar dispositivos individuales.
El uso de una VPN con OpenWRT no sólo protege sus datos, sino que también permite el acceso remoto a su red, por lo que es ideal para el trabajo o proyectos personales.
Supervisión y optimización del rendimiento de la red
Monitorizar el rendimiento de tu red te ayuda a identificar cuellos de botella y optimizar su eficiencia. OpenWRT proporciona herramientas para realizar un seguimiento del uso, analizar el tráfico y mejorar el rendimiento general.
Instalar herramientas de supervisión:
Use the package manager to install tools likeluci-app-statisticsoiftop. Estas herramientas proporcionan datos en tiempo real sobre el uso del ancho de banda, los dispositivos conectados y el tráfico de red.Analizar el tráfico:
Access the monitoring tools through the OpenWRT interface. Review graphs and reports to identify devices consuming excessive bandwidth or causing network congestion.Optimizar la configuración inalámbrica:
- Ajuste el canal inalámbrico para reducir las interferencias de las redes vecinas.
- Enable WPA3 encryption for enhanced security and better performance.
- Utiliza un adaptador WiFi USB para mejorar el alcance y la velocidad si el módulo incorporado es insuficiente.
- Actualizar Firmware: Comprueba regularmente si hay actualizaciones del firmware de OpenWRT. Las actualizaciones suelen incluir mejoras de rendimiento y parches de seguridad.
Nota: El diseño ligero de OpenWRT garantiza un uso eficiente de los recursos, lo que permite que incluso el hardware más antiguo ofrezca un rendimiento fiable.
Al supervisar y optimizar su red, puede mantener una conexión rápida, segura y estable para todos sus dispositivos.
Explorando los routers Huasifei OpenWRT
Huasifei has established itself as a trusted name in the world of network communication equipment. Since 2017, the company has focused on creating high-quality products that cater to both tech enthusiasts and everyday users. Their OpenWRT routers stand out for their customizability, affordability, and robust performance. In this section, you’ll learn about Huasifei’s product offerings, the benefits of choosing their routers, and how to reach out for support.
Visión general de los productos Huasifei OpenWRT
Huasifei ofrece una amplia gama de routers compatibles con OpenWRT diseñados para satisfacer diversas necesidades de red. Tanto si está configurando una red doméstica como si gestiona una pequeña empresa, Huasifei tiene una solución para usted. Estos son algunos de los productos más destacados de su gama:
- Enrutadores inalámbricos OpenWRT: Estos routers ofrecen una conectividad perfecta y opciones de personalización avanzadas. Gracias a la compatibilidad con OpenWRT, puedes ajustar la configuración para optimizar tu red en cuanto a velocidad, seguridad o casos de uso específicos.
- Routers WiFi6 5G: Combinando la última tecnología WiFi6 con conectividad 5G, estos routers ofrecen acceso a Internet de alta velocidad. Son ideales para usuarios que exigen un rendimiento rápido y fiable.
- Routers celulares SIM 5G de calidad industrial: Diseñados para aplicaciones industriales, estos routers ofrecen una conectividad celular segura y robusta. Son perfectos para entornos en los que las conexiones tradicionales por cable no son viables.
- Puentes inalámbricos y conmutadores POE: Estos dispositivos complementan la gama de routers de Huasifei, proporcionando soluciones de red adicionales para configuraciones complejas.
Each product undergoes rigorous testing to meet international standards like CE, ROHS, and FCC. This ensures you receive a reliable and high-performing device.
¿Sabías que...?
Los routers de Huasifei no sólo son potentes, sino también asequibles. Logran un equilibrio entre coste y capacidad, lo que los hace accesibles a una amplia gama de usuarios.
Ventajas de usar routers Huasifei OpenWRT
Elegir un router Huasifei OpenWRT tiene varias ventajas que mejoran tu experiencia de red. A continuación te explicamos por qué estos routers son una gran elección:
- Personalización: La compatibilidad con OpenWRT te permite adaptar la configuración de tu router a tus necesidades específicas. Puedes configurar funciones avanzadas como VPN, cortafuegos y priorización del tráfico.
- Asequibilidad: Los routers Huasifei ofrecen prestaciones de primera a precios competitivos. Esto los convierte en una excelente opción para los usuarios que buscan un alto rendimiento sin arruinarse.
- Fiabilidad: Cada router se somete a un estricto control de calidad para garantizar su durabilidad y rendimiento constante. Puede confiar en los dispositivos Huasifei para realizar tareas exigentes con facilidad.
- Facilidad de uso: A pesar de sus avanzadas prestaciones, los routers Huasifei son fáciles de usar. La interfaz intuitiva y la documentación detallada facilitan la configuración y la gestión.
- Versatilidad: Desde redes domésticas a aplicaciones industriales, los routers Huasifei se adaptan a una amplia gama de escenarios. Sus productos son adecuados tanto para usuarios ocasionales como para expertos en tecnología.
Al elegir Huasifei, tendrá acceso a un router que combina modernas funciones de gestión con una conectividad perfecta. Estas ventajas hacen de los routers Huasifei una opción convincente para cualquiera que desee actualizar su red.
Cómo ponerse en contacto con Huasifei
Huasifei se compromete a ofrecer una excelente atención al cliente. Si tiene preguntas o necesita ayuda, ponerse en contacto con su equipo es muy sencillo. A continuación le indicamos cómo puede ponerse en contacto:
- Correo electrónico: Envíe sus consultas a
huasifei@huasifei.com. Su equipo suele responder con prontitud para resolver sus dudas. - Teléfono: Llame a su línea de asistencia al
+8615986773006en horario de oficina (de lunes a domingo, de 9.00 a 19.00 horas). - Sitio web oficial: Visit huasifei-link.com for detailed product information, FAQs, and additional contact options.
- Dirección: Si prefiere la comunicación en persona, puede visitar su sede en Longhua, Shenzhen, Guangdong, China.
Consejo profesional: Antes de ponerte en contacto con el servicio de asistencia, consulta la documentación del producto y las preguntas más frecuentes en su sitio web. Puede que encuentres respuestas rápidas a preguntas habituales.
La dedicación de Huasifei a la satisfacción del cliente garantiza que reciba la ayuda que necesita, tanto si se trata de solucionar un problema como de explorar funciones avanzadas.
PREGUNTAS FRECUENTES
Here are some frequently asked questions about setting up an OpenWRT router on a Raspberry Pi. These answers aim to address common concerns and provide clarity for your setup process.
1. ¿Qué es OpenWRT y por qué debería usarlo en una Raspberry Pi?
OpenWRT es un firmware de código abierto diseñado para routers y dispositivos integrados. Ofrece opciones avanzadas de personalización, mayor seguridad y mejor rendimiento en comparación con el firmware tradicional para routers. El uso de OpenWRT en una Raspberry Pi le permite crear un router rentable, flexible y potente adaptado a sus necesidades específicas.
Visión del usuario:
“I love how OpenWRT lets me prioritize devices and set up guest networks effortlessly. It’s perfect for customizing my home network.”
2. ¿Qué modelo de Raspberry Pi funciona mejor con OpenWRT?
La Raspberry Pi 4 (4 GB RAM) es muy recomendable por su gran capacidad de procesamiento y su puerto Ethernet integrado. Sin embargo, incluso los modelos más antiguos, como la Raspberry Pi 3, pueden realizar tareas básicas de enrutamiento. Para funciones avanzadas o un uso intensivo, elige un modelo con más RAM y mejores capacidades de hardware.
3. ¿Necesito hardware adicional para configurar OpenWRT en una Raspberry Pi?
Sí, necesitarás algunos componentes esenciales:
- Una tarjeta MicroSD fiable (al menos 8 GB) para el sistema operativo OpenWRT.
- Una fuente de alimentación compatible con tu Raspberry Pi.
- Cables Ethernet para conexiones WAN y LAN.
- Un adaptador de USB a Ethernet si tu Raspberry Pi sólo tiene un puerto Ethernet.
- Soluciones de refrigeración opcionales, como disipadores de calor o ventiladores, para evitar el sobrecalentamiento durante un uso prolongado.
4. ¿Cómo accedo a la interfaz de OpenWRT después de la instalación?
Después de arrancar tu Raspberry Pi con la imagen OpenWRT, conecta tu ordenador a la misma red. Abra un navegador web y escriba 192.168.1.1 en la barra de direcciones. Utilice las credenciales predeterminadas (nombre de usuario: raízsin contraseña) para iniciar sesión. A continuación, se le pedirá que establezca una contraseña segura.
Consejo profesional: Si no puede acceder a la interfaz, asegúrese de que su ordenador está en la misma subred que la Raspberry Pi. Es posible que tenga que configurar manualmente la dirección IP de su ordenador.
5. ¿Puedo utilizar WiFi con mi router OpenWRT en Raspberry Pi?
Sí, puedes habilitar la funcionalidad WiFi a través de la interfaz OpenWRT. Si el módulo WiFi integrado de tu Raspberry Pi carece de alcance o rendimiento, considera la posibilidad de utilizar un adaptador WiFi USB. Esto mejora la conectividad inalámbrica y proporciona una mejor cobertura para tu red.
6. ¿Cómo puedo proteger mi router OpenWRT?
Para asegurar tu router:
- Establezca una contraseña segura durante la configuración inicial.
- Activa el cifrado WPA2-PSK o WPA3 para tu red inalámbrica.
- Configure las reglas del cortafuegos para bloquear el acceso no autorizado.
- Regularly update OpenWRT firmware to patch vulnerabilities and improve performance.
7. ¿Qué debo hacer si mis dispositivos no pueden conectarse a Internet?
Si tus dispositivos no pueden acceder a Internet:
- Comprueba la configuración de la interfaz WAN en la interfaz OpenWRT. Asegúrate de que coinciden con los requisitos de tu ISP.
- Compruebe que el cable Ethernet que conecta el módem y la Raspberry Pi es seguro.
- Reinicia el módem y el router para actualizar la conexión.
- Confirme que el servidor DHCP está activado en la configuración de la interfaz LAN.
8. ¿Puedo instalar funciones adicionales en mi router OpenWRT?
Sí, OpenWRT admite una amplia gama de paquetes adicionales. Puedes instalar herramientas para bloquear anuncios, configurar VPN, monitorizar la red y mucho más. Accede al gestor de paquetes de la interfaz de OpenWRT para explorar e instalar estas funciones.
¿Sabías que...?
El diseño modular de OpenWRT permite ampliar las capacidades del router, lo que lo convierte en una solución versátil tanto para uso doméstico como profesional.
9. ¿Es OpenWRT adecuado para principiantes?
Sí, OpenWRT es fácil de usar para principiantes cuando se combina con una guía detallada como esta. La interfaz web simplifica la configuración, y la gran comunidad OpenWRT proporciona amplios recursos y soporte para la resolución de problemas.
10. ¿Dónde puedo encontrar ayuda si tengo problemas?
Si te enfrentas a retos, puedes hacerlo:
- Visita los foros oficiales de OpenWRT y la documentación para obtener orientación.
- Explora las comunidades en línea y los tutoriales para obtener consejos sobre la solución de problemas.
- Ponte en contacto con el equipo de soporte de Huasifei si utilizas uno de sus routers compatibles con OpenWRT. Ponte en contacto con ellos por correo electrónico en
huasifei@huasifei.comor visit their website at huasifei-link.com.
Consejos de expertos:
"No dudes en pedir ayuda a la comunidad OpenWRT. Son increíblemente solidarios y están bien informados".
Esta sección de preguntas frecuentes aborda las cuestiones más comunes para ayudarte a configurar y gestionar tu router OpenWRT de forma eficaz. Si tiene más preguntas, no dude en dejar un comentario o explorar la comunidad OpenWRT para obtener más información.
Configurar un router OpenWRT en una Raspberry Pi te permite tomar el control total de tu red. Obtendrás mayor seguridad, mejor rendimiento y la posibilidad de personalizar las funciones para adaptarlas a tus necesidades. Explorar opciones avanzadas como VPNs o monitorización de red puede elevar aún más tu experiencia. La guía paso a paso simplifica el proceso, haciéndolo accesible incluso para los principiantes. Comparte tu experiencia o haz preguntas en los comentarios. Sus ideas podrían inspirar a otros a adoptar esta solución potente y rentable para sus redes domésticas o de oficina.